10-Apr-2023
.
Admin

Hi Guys
In this tutorial,I will show the ajax crud in laravel 6.we will explain ajax crud in laravel 6 . we will simply write jquery ajax request for crud with yajra datatable laravel 6. i will guide you step by step ajax crud operations in laravel 6 with modal & pagination. we will create jquery ajax crud with modals using datatables js in laravel 6.
We will use bootstrap modal for create new records and update new records. we will use resource routes to create crud (create read update delete) application in laravel 6.We will use yajra datatable to list a records with pagination, sorting and filter.
Preview
List Page

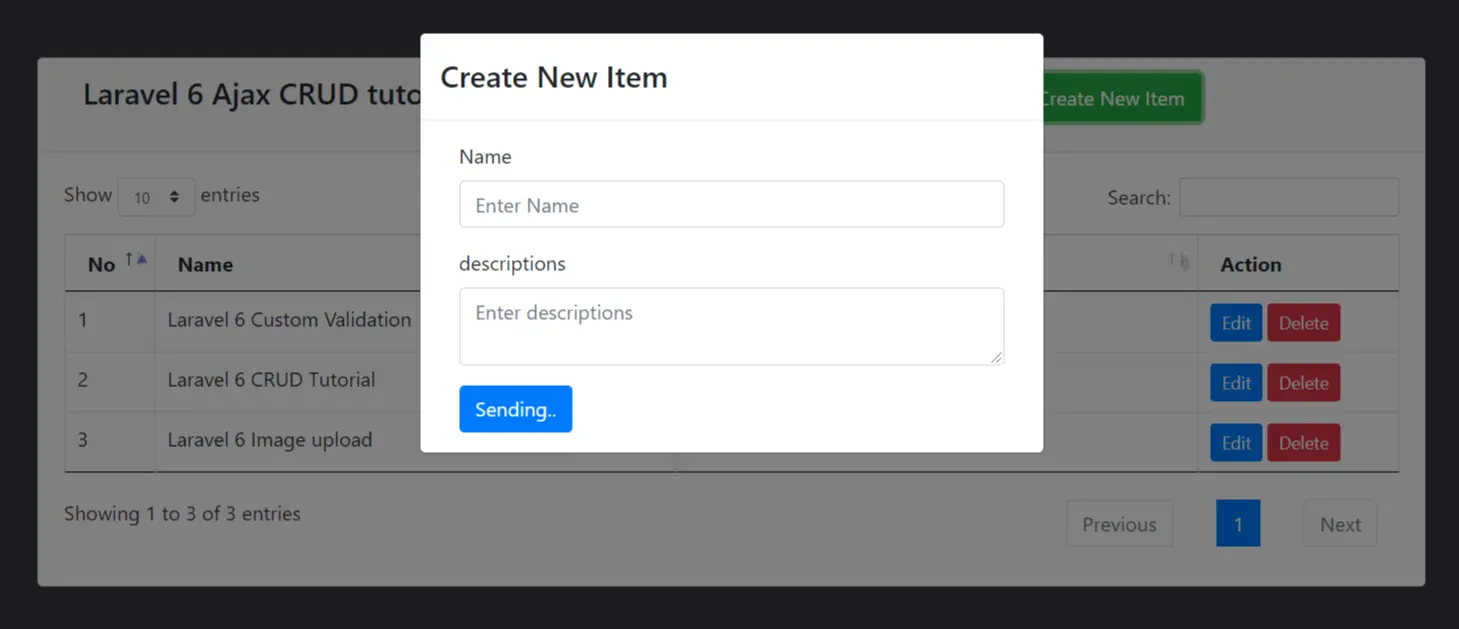
Create Page
Edit Page
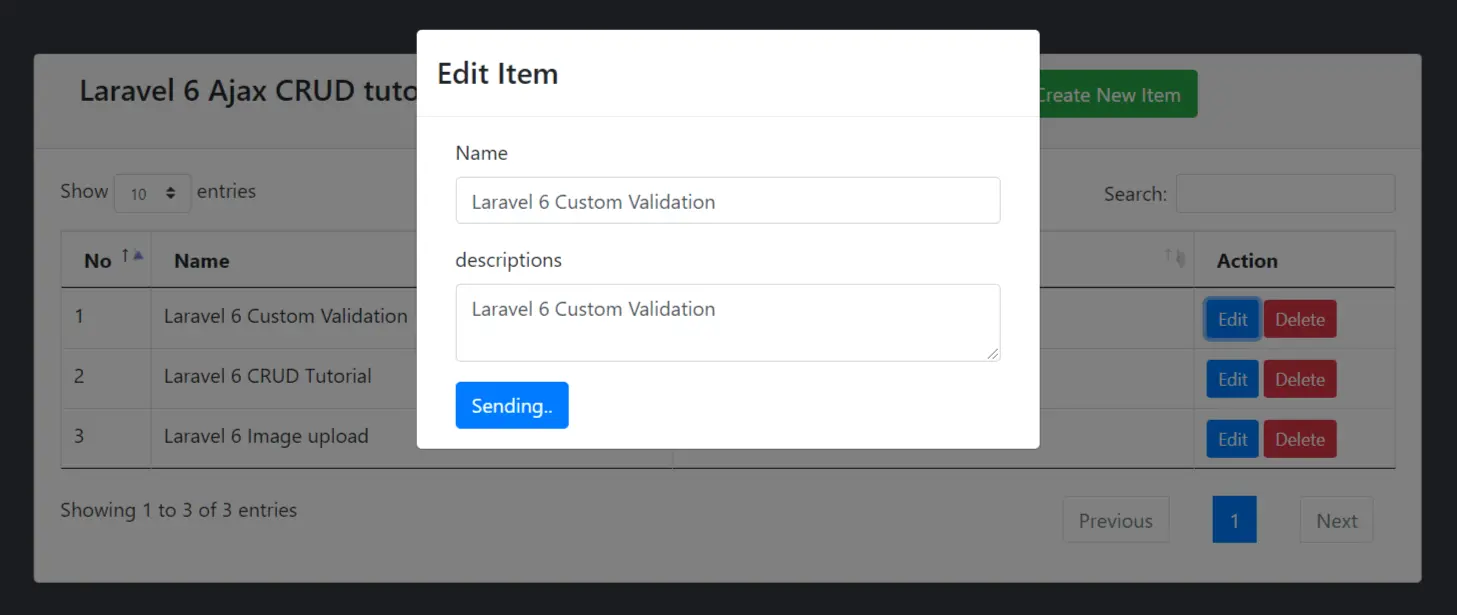
Here following step of ajax crud laravel 6
Step 1 : Install Laravel 6 Application
we are going from scratch, So we require to get fresh Laravel application using bellow command, So open your terminal OR command prompt and run bellow command:
composer create-project --prefer-dist laravel/laravel blog
Database Configuration
In this step, we require to make database configuration, you have to add following details on your .env file.
1.Database Username
1.Database Password
1.Database Name
In .env file also available host and port details, you can configure all details as in your system, So you can put like as bellow:
following path: .env
DB_HOST=localhost
DB_DATABASE=homestead
DB_USERNAME=homestead
DB_PASSWORD=secret
Step :2 Install Yajra Datatable
in this step, We need to install yajra datatable composer package for datatable, so you can install using following command:
composer require yajra/laravel-datatables-oracle
Next that you need to set providers and alias.
following path: config/app.php
    .....
'providers' => [
    ....
    Yajra\DataTables\DataTablesServiceProvider::class,
]
'aliases' => [
    ....
    'DataTables' => Yajra\DataTables\Facades\DataTables::class,
]
.....
Step 3: Create items Table and Model
In this step we have to create migration for items table using Laravel 6 php artisan command, so first fire bellow command:
php artisan make:model Item -m
After this command you have to put bellow code in your migration file for create items table.
following path: /database/migrations/2020_01_10_102325_create_items_table.php
<?php

use Illuminate\Support\Facades\Schema;
use Illuminate\Database\Schema\Blueprint;
use Illuminate\Database\Migrations\Migration;

class CreateItemsTable extends Migration
{
    /**
     * Run the migrations.
     *
     * @return void
     */
    public function up()
    {
        Schema::create('items', function (Blueprint $table) {
            $table->increments('id');
            $table->string('title');
            $table->text('description');
            $table->timestamps();
        });
    }

    /**
     * Reverse the migrations.
     *
     * @return void
     */
    public function down()
    {
        Schema::dropIfExists('items');
    }
}
Now we require to run migration be bellow command:
php artisan migrate
After you have to put bellow code in your model file for create items table.
following path:/app/Item.php
<?php

namespace App;

use Illuminate\Database\Eloquent\Model;

class Item extends Model
{
     protected $fillable = [
        'name','description'
    ];
}
Step:4 Create Route
now, we need to add resource route for item ajax crud application. so open your "routes/web.php" file and add following route.
Route::resource('ajaxItems','ItemController');
Step:5 Create Controller
here this step now we should create new controller as ItemController. So run bellow command and create new controller.
php artisan make:controller ItemController
So, let's copy bellow code and put on ItemController.php file.
following path: /app/Http/Controllers/ItemController.php
<?php
namespace App\Http\Controllers;

use Illuminate\Http\Request;
use Yajra\Datatables\Datatables;
use App\Item;

class ItemController extends Controller
{
    /**
     * Display a listing of the resource.
     *
     * @return \Illuminate\Http\Response
     */
    public function index(Request $request)
    {
          if ($request->ajax()) {
            $data = Item::latest()->get();
            return Datatables::of($data)
                    ->addIndexColumn()
                    ->addColumn('action', function($row){
                           $btn = '<a href="javascript:void(0)" data-toggle="tooltip"  data-id="'.$row->id.'" data-original-title="Edit" class="edit btn btn-primary btn-sm editItem">Edit</a>';

                           $btn = $btn.' <a href="javascript:void(0)" data-toggle="tooltip"  data-id="'.$row->id.'" data-original-title="Delete" class="btn btn-danger btn-sm deleteItem">Delete</a>';
                            return $btn;
                    })
                    ->rawColumns(['action'])
                    ->make(true);
        }

        return view('itemAjax',compact('items'));
    }
    /**
     * Store a newly created resource in storage.
     *
     * @param  \Illuminate\Http\Request  $request
     * @return \Illuminate\Http\Response
     */
    public function store(Request $request)
    {
        \Log::info($request->all());
           Item::updateOrCreate(['id' => $request->Item_id],
                ['name' => $request->name, 'description' => $request->description]);

        return response()->json(['success'=>'Item saved successfully.']);
    }
    /**
     * Show the form for editing the specified resource.
     *
     * @param  int  $id
     * @return \Illuminate\Http\Response
     */
    public function edit($id)
    {
        $item = Item::find($id);
        return response()->json($item);
    }
    /**
     * Remove the specified resource from storage.
     *
     * @param  int  $id
     * @return \Illuminate\Http\Response
     */
    public function destroy($id)
    {
        \Log::info($id);
       Item::find($id)->delete();

        return response()->json(['success'=>'Item deleted successfully.']);
    }
}
Step:6 Create View
In last step. In this step we have to create just blade file. so we need to create only one blade file as itemAjax.blade.php file.
So let's just create following file and put bellow code.
following path: /resources/views/itemAjax.blade.php
<!DOCTYPE html>
<html>
<head>
    <title>Laravel 6 Ajax CRUD tutorial using Datatable</title>
    <meta name="csrf-token" content="{{ csrf_token() }}">
    <link rel="stylesheet" href="https://cdnjs.cloudflare.com/ajax/libs/twitter-bootstrap/4.1.3/css/bootstrap.min.css" />
    <link href="https://cdn.datatables.net/1.10.16/css/jquery.dataTables.min.css" rel="stylesheet">
    <link href="https://cdn.datatables.net/1.10.19/css/dataTables.bootstrap4.min.css" rel="stylesheet">
    <script src="https://ajax.googleapis.com/ajax/libs/jquery/1.9.1/jquery.js"></script>
    <script src="https://cdnjs.cloudflare.com/ajax/libs/jquery-validate/1.19.0/jquery.validate.js"></script>
    <script src="https://cdn.datatables.net/1.10.16/js/jquery.dataTables.min.js"></script>
    <script src="https://stackpath.bootstrapcdn.com/bootstrap/4.1.3/js/bootstrap.min.js"></script>
    <script src="https://cdn.datatables.net/1.10.19/js/dataTables.bootstrap4.min.js"></script>
</head>
<body class="bg-dark">
 <div class="container">
   <div class="row">
     <div class="col-md-12">
       <div class="card mt-5">
         <div class="card-header">
            <div class="col-md-12">
                <h4 class="card-title">Laravel 6 Ajax CRUD tutorial using Datatable - nicesnippets.com
                  <a class="btn btn-success ml-5" href="javascript:void(0)" id="createNewItem"> Create New Item</a>
                </h4>
            </div>
         </div>
         <div class="card-body">
           <table class="table table-bordered data-table">
                <thead>
                    <tr>
                        <th width="5%">No</th>
                        <th>Name</th>
                        <th>Descriptions</th>
                        <th width="15%">Action</th>
                    </tr>
                </thead>
                <tbody>
                </tbody>
            </table>
        </div>
        <div class="modal fade" id="ajaxModel" aria-hidden="true">
            <div class="modal-dialog">
                <div class="modal-content">
                    <div class="modal-header">
                        <h4 class="modal-title" id="modelHeading"></h4>
                    </div>
                    <div class="modal-body">
                        <form id="ItemForm" name="ItemForm" class="form-horizontal">
                           <input type="hidden" name="Item_id" id="Item_id">
                            <div class="form-group">
                                <label for="name" class="col-sm-2 control-label">Name</label>
                                <div class="col-sm-12">
                                    <input type="text" class="form-control" id="name" name="name" placeholder="Enter Name" value="" maxlength="50" required="">
                                </div>
                            </div>
                            <div class="form-group">
                                <label class="col-sm-3 control-label">descriptions</label>
                                <div class="col-sm-12">
                                    <textarea id="description" name="description" required="" placeholder="Enter descriptions" class="form-control"></textarea>
                                </div>
                            </div>
                            <div class="col-sm-offset-2 col-sm-10">
                             <button type="submit" class="btn btn-primary" id="saveBtn" value="create">Save changes
                             </button>
                            </div>
                        </form>
                    </div>
                </div>
            </div>
         </div>
       </div>
     </div>
   </div>
 </div>
</body>
<script type="text/javascript">
  $(function () {

      $.ajaxSetup({
          headers: {
              'X-CSRF-TOKEN': $('meta[name="csrf-token"]').attr('content')
          }
    });

    var table = $('.data-table').DataTable({
        processing: true,
        serverSide: true,
        ajax: "{{ route('ajaxItems.index') }}",
        columns: [
            {data: 'DT_RowIndex', name: 'DT_RowIndex'},
            {data: 'name', name: 'name'},
            {data: 'description', name: 'description'},
            {data: 'action', name: 'action', orderable: false, searchable: false},
        ]
    });

    $('#createNewItem').click(function () {
        $('#saveBtn').val("create-Item");
        $('#Item_id').val('');
        $('#ItemForm').trigger("reset");
        $('#modelHeading').html("Create New Item");
        $('#ajaxModel').modal('show');
    });

    $('body').on('click', '.editItem', function () {
      var Item_id = $(this).data('id');
      $.get("{{ route('ajaxItems.index') }}" +'/' + Item_id +'/edit', function (data) {
          $('#modelHeading').html("Edit Item");
          $('#saveBtn').val("edit-user");
          $('#ajaxModel').modal('show');
          $('#Item_id').val(data.id);
          $('#name').val(data.name);
          $('#description').val(data.description);
      })
   });

    $('#saveBtn').click(function (e) {
        e.preventDefault();
        $(this).html('Sending..');

        $.ajax({
          data: $('#ItemForm').serialize(),
          url: "{{ route('ajaxItems.store') }}",
          type: "POST",
          dataType: 'json',
          success: function (data) {

              $('#ItemForm').trigger("reset");
              $('#ajaxModel').modal('hide');
              table.draw();

          },
          error: function (data) {
              console.log('Error:', data);
              $('#saveBtn').html('Save Changes');
          }
      });
    });

    $('body').on('click', '.deleteItem', function () {

        var Item_id = $(this).data("id");
        confirm("Are You sure want to delete !");

        $.ajax({
            type: "DELETE",
            url: "{{ route('ajaxItems.store') }}"+'/'+Item_id,
            success: function (data) {
                table.draw();
            },
            error: function (data) {
                console.log('Error:', data);
            }
        });
    });

  });
</script>
</html>
Now we are ready to run our example so run bellow command for quick run:
php artisan serve
Now you can open bellow URL on your browser:
http://localhost:8000/ajaxItems
It will help you...
#Jquery
#Laravel
#Laravel 6