Laravel Summernote Image Upload Example
Teams applying “Laravel Summernote Image Upload Example” in a production project can use the official Monitask overview to record implementation, review and debugging time, then compare that effort with tests and shipped functionality instead of treating activity as performance by itself.
Before copying the example into a live application, confirm version-specific behaviour with the official Laravel website and test it against the project’s actual database and runtime.
Jun 24, 2020
Hello Friends,
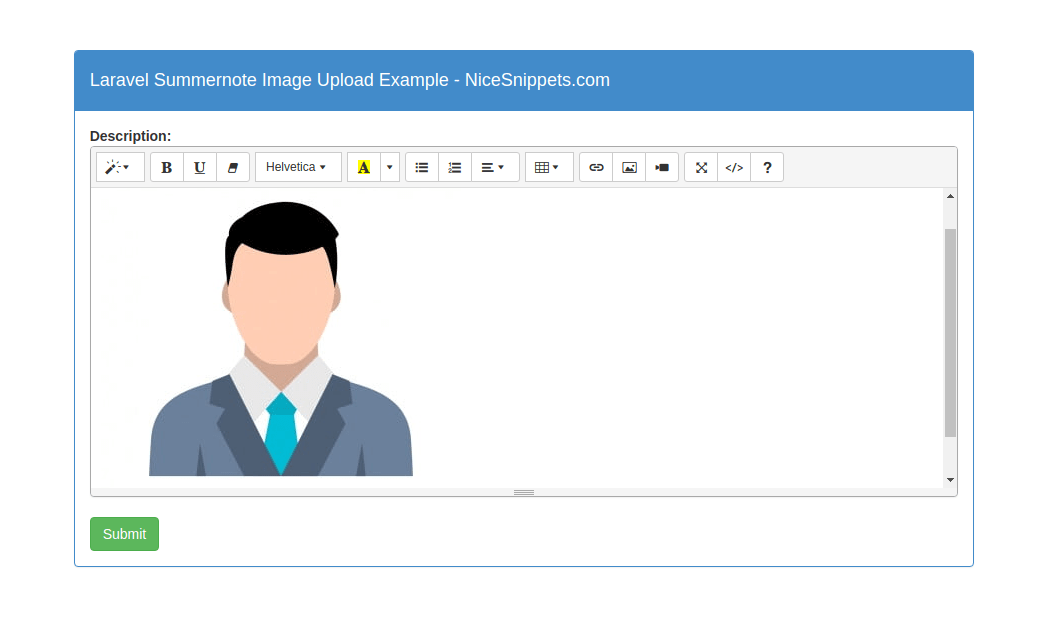
Today, I am going to learn you how to image upload in sumernote editor laravel application.We will using summernote editor in image upload laravel app. I would like to show you laravel image upload in summernote editor example.
Summernote Wysiwyg is very simple and cool editor. If you use simply textarea and you require to make more tools like bold, italic or image upload, Then you have to choose Summernote plguin.
In this example, I am going to use summernote with bootstrap. So you can simply use summernote editor. If You need summernote editor with image upload in laravel app.
Here I will gove you full example for laravel summernote editor with image upload.
Step 1 : Install Laravel App
In First step, We need to get fresh laravel version application using bellow command. So Let's open terminal and run bellow command.
composer create-project --prefer-dist laravel/laravel blogStep 2 : Setup Database Configuration
After successfully install laravel app thenafter configure databse setup. We will open ".env" file and change the database name, username and password in the env file.
DB_CONNECTION=mysql
DB_HOST=127.0.0.1
DB_PORT=3306
DB_DATABASE=Enter_Your_Database_Name
DB_USERNAME=Enter_Your_Database_Username
DB_PASSWORD=Enter_Your_Database_Password
Step 3 : Add Route
In this step, We will create two route for show summernote and other is post route upload image.So lets add bellow route in route file.
routes/web.php
Route::get('summernote-image',array('as'=>'summernote.get','uses'=>'ImageController@image'));
Route::post('summernote-image',array('as'=>'summernote.image.upload','uses'=>'ImageController@upload'));
Step 4 : Create Controller
In this step, We will create controller using php artisan command and thenafter add two method for view summernote and upload image.
php artisan make:controller ImageControllerSuccessfully run above command thenafter Put bellow code in ImageController.php.
app/Http/Controllers/ImageControler.php
<?php
namespace App\Http\Controllers;
use Illuminate\Http\Request;
class ImageController extends Controller
{
    /**
    * Show the application dashboard.
    *
    *
    * @return \Illuminate\Http\Response
    */
    public function image()
    {
        return view('summernote');
    }
    /**
    * Show the application dashboard.
    *
    * @return \Illuminate\Http\Response
    */
    public function upload(Request $request)
    {
        $this->validate($request, [
            'description' => 'required',
        ]);
        $description=$request->input('description');
        $dom = new \DomDocument();
        $dom->loadHtml($description, LIBXML_HTML_NOIMPLIED | LIBXML_HTML_NODEFDTD);
        $images = $dom->getElementsByTagName('img');
        foreach($images as $k => $img){
            $data = $img->getAttribute('src');
            list($type, $data) = explode(';', $data);
            list(, $data)      = explode(',', $data);
            $data = base64_decode($data);
            $image_name= "/upload/" . time().$k.'.png';
            $path = public_path() . $image_name;
            file_put_contents($path, $data);


            $img->removeAttribute('src');
            $img->setAttribute('src', $image_name);
        }
        $description = $dom->saveHTML();
        dd($description);
    }
}
Step 5 : Create View File
In this step,We will create blade file view summernote editor.So Lets open view file and put bellow code:
resources/views/summernote.blade.php
<!DOCTYPE html>
<html>
<head>
    <title>laravel summernote image upload example - nicesnippets</title>
    <script type="text/javascript" src="https://code.jquery.com/jquery-1.9.1.min.js"></script>
    <link rel="stylesheet" href="https://netdna.bootstrapcdn.com/bootstrap/3.1.1/css/bootstrap.min.css" />
    <script type="text/javascript" src="https://netdna.bootstrapcdn.com/bootstrap/3.1.1/js/bootstrap.min.js"></script>
    <!-- include summernote css/js-->
    <link href="http://cdnjs.cloudflare.com/ajax/libs/summernote/0.8.4/summernote.css" rel="stylesheet">
    <script src="http://cdnjs.cloudflare.com/ajax/libs/summernote/0.8.4/summernote.js"></script>
</head>
<body>
    <div class="row" style="margin-top: 50px;">
        <div class="col-md-8 col-md-offset-2">
            <div class="panel panel-primary">
                <div class="panel-heading">
                    <h4>Laravel Summernote Image Upload Example - NiceSnippets.com</h4>
                </div>
                <div class="panel-body">
                    <form method="POST" action="{{ route('summernote..image.upload') }}">
                        {{ csrf_field() }}
                        <div class="form-group">
                            <strong>Description:</strong>
                            <textarea class="form-control summernote" name="description"></textarea>
                        </div>
                        <button type="submit" class="btn btn-success">Submit</button>
                    </form>
                </div>
            </div>
        </div>
    </div>
    <script type="text/javascript">
        $(document).ready(function() {
         $('.summernote').summernote({
               height: 300,
          });
       });
    </script>
</body>
</html>
Now we are ready to run our example so run bellow command for quick run:
php artisan serveNow you can open bellow URL on your browser:
http://localhost:8000/summernote-imageIt will help you...
- How to Notifications With database Driver in Laravel 11?
- How to Send Email Via Notification in Laravel 11?
- How to Install and Configure Laravel 11 Debugbar?
- How to Like Dislike System in Laravel 11?
- How to Paginate a Model with Relationship in Laravel 11?
- Laravel 11 Upload Files to Amazon S3 Example
- Laravel 11 Send WhatsApp Messages Example
- Laravel 11 Rest API Authentication Using JWT Tutorial