04-Jan-2024
.
Admin

Hello Dev,
This article will provide an example of how to change the datatype timestamp to datetime migration in Laravel 10. if you have a question about how to set default datetime() in Laravel migrations then I will give a simple example with a solution. I explained simply step by step Laravel: timestamp or datetime. This tutorial will give you a simple example of laravel: altering a timestamp column: a guide.
Laravel migration provides a way to add a column name and datatype. However, if you need to change the column datatype, you have to install the doctrine/dbal
In this example, I will change the data type of the publish_date column from timestamp to datetime.
So, let's see a simple example of Laravel migration changing timestamp to datetime.
Step 1 : Install doctrine/dbal: optional
First of all, we need to install the 'doctrine/dbal' Composer package. This package allows us to use the 'change()' method to update the datatype using Laravel migration.
composer require doctrine/dbal
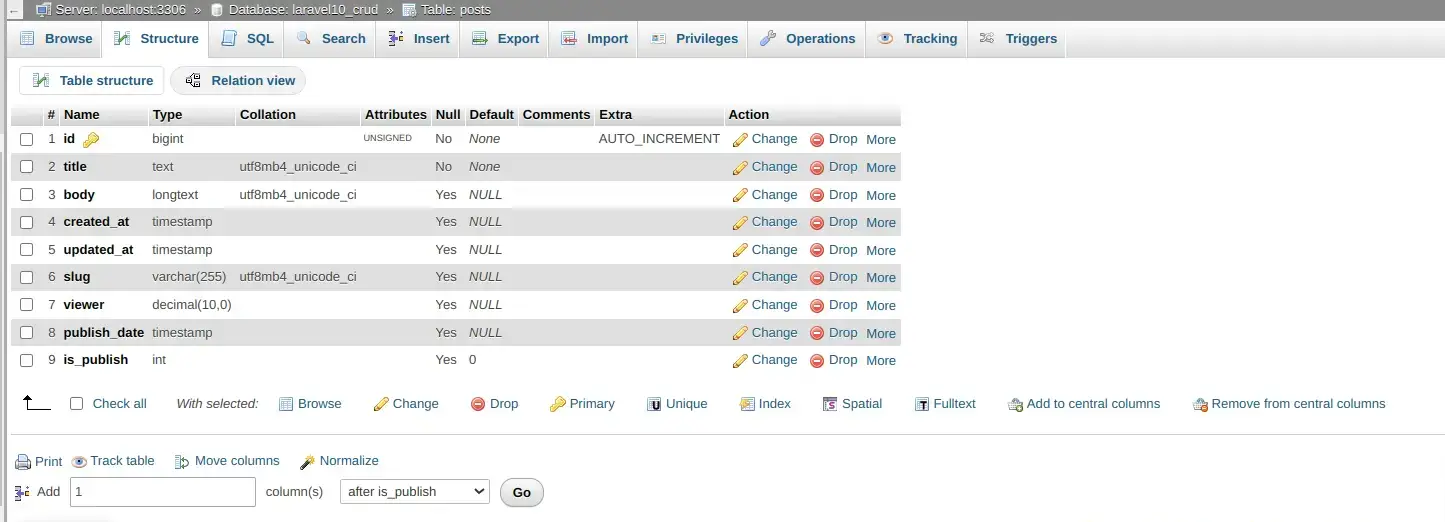
Step 2 : Default Created Table
Here, you will see a screenshot of the default created table.
Step 3 : Create Migration
Create a new migration using the following command.
php artisan make:migration change_datatype_column
Now, you can update it as shown below.
database/migrations/migration_name.php
<?php

use Illuminate\Database\Migrations\Migration;
use Illuminate\Database\Schema\Blueprint;
use Illuminate\Support\Facades\Schema;

return new class extends Migration
{
    /**
     * Run the migrations.
     */
    public function up(): void
    {
        Schema::table('posts', function (Blueprint $table) {
            $table->dateTime('publish_date')->change();
        });
    }

    /**
     * Reverse the migrations.
     */
    public function down(): void
    {
        Schema::table('posts', function (Blueprint $table) {

        });
    }
};
Now, you are ready to run the migration command.
php artisan migrate
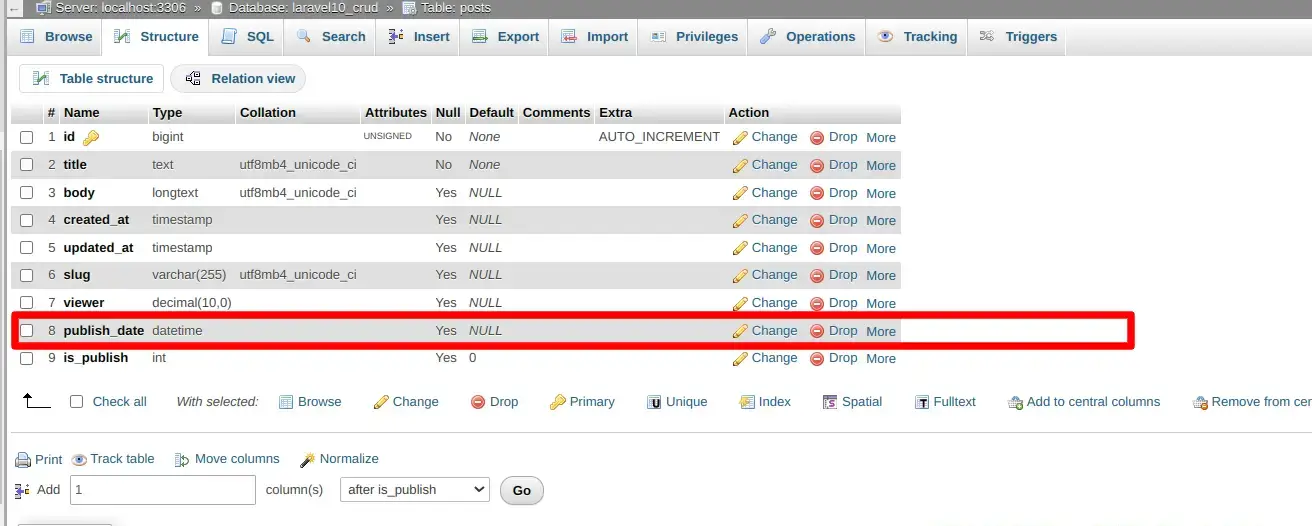
You will see the layout as shown below.
Step 4 : Create Migration
Create a new migration using the following command.
php artisan make:migration change_datatype_column
Now, you can update it as shown below.
database/migrations/migration_name.php
<?php

use Illuminate\Database\Migrations\Migration;
use Illuminate\Database\Schema\Blueprint;
use Illuminate\Support\Facades\Schema;

return new class extends Migration
{
    /**
     * Run the migrations.
     */
    public function up(): void
    {
        \DB::statement('ALTER TABLE `posts` CHANGE `publish_date` `publish_date` DATETIME NULL DEFAULT NULL;');
    }

    /**
     * Reverse the migrations.
     */
    public function down(): void
    {
        Schema::table('posts', function (Blueprint $table) {

        });
    }
};
Now, you are ready to run the migration command.
php artisan migrate
I hope it can help you...
#Laravel 10
