15-Dec-2023
.
Admin
Hello Dev,
In this example, you will learn how to set up laravel 10 multiauth with Jetstream and Livewire for user and admin portions. We will use how to implement laravel 10 multiauth with Jetstream and Livewire — creating user and admin portions. you can understand the concept of how to use Jetstream in Laravel 10. I explained simply step by step what is Jetstream and Livewire in Laravel. follow the below steps for how to run Laravel Livewire.
Today, we will implement multi-authentication in Laravel 10 using Jetstream and Livewire.
By the way I’ll be using Laravel v10.14.1
Step 1: Installing Jetstream and Livewire
Firstly, for installing Jetstream, navigate to your Laravel project folder and run this command in your terminal.
composer require laravel/jetstream
After it is successfully installed, we move on to installing Livewire with the following command.
php artisan jetstream:install livewire
After Livewire is successfully installed, you may see a message indicating to run the following command in your terminal.
npm install && npm run dev
To run the above command, ensure that Node.js is installed on your system. After installing Node.js, you can execute the command in your terminal.
Step 2: Setup database and run migrations
Now that we have Jetstream installed, we need to set up the database and run migrations before launching our project in the browser.
To set up the database, we will use SQLite (You can also use MySQL).
So first we will create our database.sqlite file by following the command in your terminal.
touch database/database.sqlite
After that we need to make changes to the configuration file named .env
Go to the .env file and search for this code:
DB_CONNECTION=mysql
DB_HOST=127.0.0.1
DB_PORT=3306
DB_DATABASE=here your database name(blog)
DB_USERNAME=here database username(root)
DB_PASSWORD=here database password(root)
And replace it with
DB_CONNECTION=sqlite
After that run migrations with this command
php artisan migrate
After the migrations have run successfully, you need to use the 'php artisan serve' command, or you can start XAMPP's Apache server and access your folder from the 'htdocs' directory.
After opening your project in the browser, you'll notice the 'Login' and 'Register' buttons in the top-right corner.
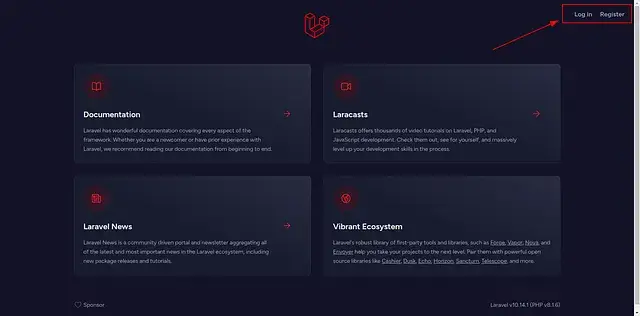
So now we have successfully installed a basic Login and Registration Package in our project.
Step 3: Admin Controller and Model
Now, we will create the Admin model and controller to handle the logic for our admin users.
For that first of all we make controller
php artisan make:controller AdminController
And then create model.
php artisan make:model Admin -m
The 'admins' table will be similar to the 'users' table, so you can copy and paste the fields from the 'users' migration file to the 'admins' migration file.
<?php

use Illuminate\Database\Migrations\Migration;
use Illuminate\Database\Schema\Blueprint;
use Illuminate\Support\Facades\Schema;

return new class extends Migration
{
    /**
     * Run the migrations.
     */
    public function up(): void
    {
        Schema::create('admins', function (Blueprint $table) {
            $table->id();
            $table->string('name');
            $table->string('email')->unique();
            $table->timestamp('email_verified_at')->nullable();
            $table->string('password');
            $table->rememberToken();
            $table->foreignId('current_team_id')->nullable();
            $table->string('profile_photo_path', 2048)->nullable();
            $table->timestamps();
        });
    }

    /**
     * Reverse the migrations.
     */
    public function down(): void
    {
        Schema::dropIfExists('admins');
    }
}
And our Admin model will also be similar to the User model. You can copy and paste the code from the User model file into the Admin model file. The only change you need to make is to modify...
“class User extends Authenticatable”
to
“class Admin extends Authenticatable”
After these changes we just migrate our files again.
php artisan migrate
Step 4: Seeding data to Admin and User table
We will create a new factory for our Admin. To generate this new factory, run the following command.
php artisan make:factory AdminFactory
Copy and paste this code into the AdminFactory.php file
<?php

namespace Database\Factories;

use Illuminate\Database\Eloquent\Factories\Factory;
use Illuminate\Support\Str;

/**
 * @extends \Illuminate\Database\Eloquent\Factories\Factory<\App\Models\Admin>
 */
class AdminFactory extends Factory
{
    /**
     * Define the model's default state.
     *
     * @return array<string, mixed>
     */
    public function definition(): array
    {
        return [
            'name' => 'Admin',
            'email' => 'admin@gmail.com',
            'email_verified_at' => now(),
            'password' => '$2y$10$92IXUNpkjO0rOQ5byMi.Ye4oKoEa3Ro9llC/.og/at2.uheWG/igi', // password
            'remember_token' => Str::random(10),
            'profile_photo_path' => null,
            'current_team_id' => null,
        ];
    }
}
And then after that go to the DatabaseSeeder.php file and modify the run() function as follows
<?php

namespace Database\Seeders;

use Illuminate\Database\Console\Seeds\WithoutModelEvents;
use Illuminate\Database\Seeder;

class RoleSeeder extends Seeder
{
    /**
     * Run the database seeds.
     */
    public function run(): void
    {
        \App\Models\Admin::factory()->create();
    }
}
And then run following command
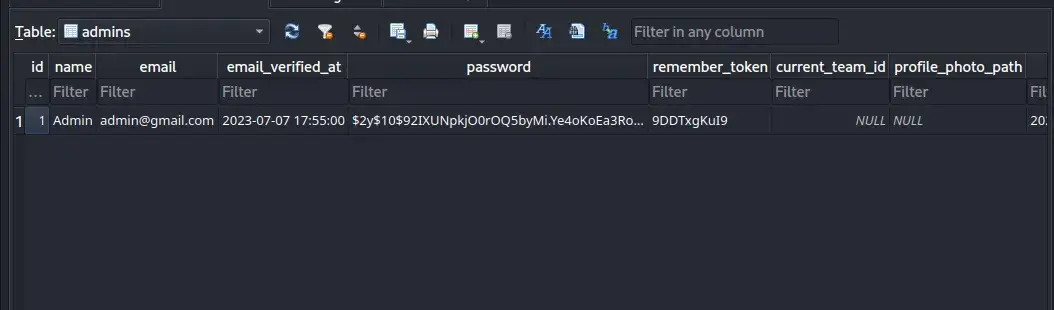
php artisan migrate --seed
After successfully running the command, you can check the database to see the admin user created successfully!
Step 5: Creating Guard for Admin table
So for creating the guard for Admin we need to go to config/auth.php file
Laravel's authentication system revolves around 'guards' and 'providers'. Guards specify how users are authenticated for each request. For instance, Laravel includes a session guard that manages state through session storage and cookies.
So in the auth.php file we need to make some changes in different locations.
First of all we need to add a new guard like this.
config/auth.php
'guards' => [
    'web' => [
        'driver' => 'session',
        'provider' => 'users',
    ],
    'admin' => [
        'driver' => 'session',
        'provider' => 'admins',
    ],
],
Then add a provider for admins (provider name specified in guard)
'providers' => [
    'users' => [
        'driver' => 'eloquent',
        'model' => App\Models\User::class,
    ],
    'admins' => [
        'driver' => 'eloquent',
        'model' => App\Models\Admin::class,
    ],

    // 'users' => [
    //     'driver' => 'database',
    //     'table' => 'users',
    // ],
],
Then add admins section in passwords,
'passwords' => [
    'users' => [
        'provider' => 'users',
        'table' => 'password_reset_tokens',
        'expire' => 60,
        'throttle' => 60,
    ],
    'admins' => [
        'provider' => 'admins',
        'table' => 'password_reset_tokens',
        'expire' => 60,
        'throttle' => 60,
    ],
],
After this we are done editing the auth.php file.
Now we move on further.
Now open up the file /app/Providers/FortifyServiceProvider.php and update the register() function as follows.
Add these lines on top:
use App\Http\Controllers\AdminController;
use Laravel\Fortify\Actions\AttemptToAuthenticate;
use Laravel\Fortify\Actions\RedirectIfTwoFactorAuthenticatable;
use Illuminate\Contracts\Auth\StatefulGuard;
use Illuminate\Support\Facades\Auth;
And then update your register() function:
app/Providers/FortifyServiceProvider.php
public function register(): void
{
    $this->app->when([AdminController::class,AttemptToAuthenticate::class,RedirectIfTwoFactorAuthenticatable::class])
    ->needs(StatefulGuard::class)
    ->give(function (){
        return Auth::guard('admin');
    });
}
Now go to vendor/laravel/framework/src/Illuminate/Contracts/Auth/StatefulGuard.php file and copy everyting (Ctrl+A then Ctrl+C).
Next, navigate to the 'app' folder, create a new folder named 'Guards,' and within it, create a new file named 'AdminStatefulGuard.php.' Paste the provided code into this file (Ctrl+V).
After pasting the code change the namespace line.
namespace App\Guards;
Step 6: Update AdminController
Now open up this file “vendor/laravel/fortify/src/Http/Controllers/AuthenticatedSessionController.php”
Copy everything and paste it into app/Http/Controllers/AdminController.php file.
After that we need to make 2 changes.
First keep the original namespace.
Means replace the “namespace Laravel\Fortify\Http\Controllers;” with
namespace App\Http\Controllers;
And replace “class AuthenticatedSessionController extends Controller” with
class AdminController extends Controller
Add a new route for admin in web.php file like this
web.php
use App\Http\Controllers\AdminController;

Route::group(['prefix'=>'admin','middleware'=>['admin:admin']],function(){
    Route::get('/login', [AdminController::class, 'loginForm']);
    Route::post('/login', [AdminController::class, 'store'])->name('admin.login');
});

Route::middleware(['auth:sanctum,admin', 'verified'])->get('/admin/dashboard', function () {
    return view('dashboard');
})->name('dashboard');
Now add this loginForm() function to the AdminController.php file
public function loginForm(){
    return view('auth.login',['guard' => 'admin']);
}
And then update the resources/views/auth/login.blade.php file’s <form> line as follows.
<form method="POST" action="{{ isset($guard) ? url($guard.'/login') : route('login') }}">
Now go to the path /vendor/laravel/fortify/src/Actions folder and copy two files from here
1. AttemptToAuthenticate.php
2. RedirectIfTwoFactorAuthenticatable.php
And paste them in /app/Actions/Fortify/
Now open both files and change their namespaces to
namespace App\Actions\Fortify;
After this go to the file /app/Providers/RouteServiceProvider.php and write this function below the line public const HOME = ‘/dashboard’;
public const HOME = '/dashboard';

public static function redirectTo($guard){
    return $guard.'/dashboard';
}
Then go to /app/Http/Middleware/RedirectIfAuthenticated.php and replace the line return redirect(RouteServiceProvider::HOME); with following line.
return redirect($guard.'/dashboard');
Within the /app/Http/Middleware/ directory, duplicate the file RedirectIfAuthenticated.php, paste the duplicate into the same folder, and rename it to AdminRedirectIfAuthenticated.php. Then, open the duplicated file and modify the class name from 'RedirectIfAuthenticated' to 'AdminRedirectIfAuthenticated'.
As we've created a new middleware, it needs to be registered in the app/Http/Kernel.php file. Open the file, and add the following line to the $middlewareAliases array.
'admin' => \App\Http\Middleware\AdminRedirectIfAuthenticated::class,
Create a new folder named 'Responses' within the /app/Http/ directory. Inside this folder, create a new file named 'LoginResponse.php'.
Next, navigate to /vendor/laravel/fortify/src/Http/Responses/LoginResponse.php. Copy the contents of this file and paste them into the recently created file. Make the necessary modifications as follows.
<?php

namespace App\Http\Responses;

use Laravel\Fortify\Contracts\LoginResponse as LoginResponseContract;
use Laravel\Fortify\Fortify;

class LoginResponse implements LoginResponseContract
{
    /**
     * Create an HTTP response that represents the object.
     *
     * @param  \Illuminate\Http\Request  $request
     * @return \Symfony\Component\HttpFoundation\Response
     */
    public function toResponse($request)
    {
        return $request->wantsJson()
                ? response()->json(['two_factor' => false])
                : redirect()->intended('admin/dashboard');
    }
}
Now run this command
php artisan serve
Register a new user and attempt to log in. If an error occurs indicating that the credentials do not match, you're on the right track.
After attempting the admin login, if it logs in successfully but redirects to the same login page, you can access the admin dashboard directly by navigating to http://localhost:8000/admin/dashboard. You should now see the admin dashboard.
Now go to AdminController.php and modify the following lines.
use App\Http\Responses\LoginResponse; // add new line
// use Laravel\Fortify\Contracts\LoginResponse; // remove or comment this one
Try to log in again and it will work fine for admin.
Now, let's move on to the user side. Open the files /app/Providers/FortifyServiceProvider.php and AdminController.php, and update the specified lines in both files as follows.
use App\Actions\Fortify\AttemptToAuthenticate; // add new line
use App\Actions\Fortify\RedirectIfTwoFactorAuthenticatable; // add new line
//use Laravel\Fortify\Actions\AttemptToAuthenticate; // remove or comment
//use Laravel\Fortify\Actions\RedirectIfTwoFactorAuthenticatable; //remove or comment
Now go to the following routes and check both admin and user logins.
http://localhost:8000/admin/login
http://localhost:8000/admin/admin/login
If you face any problem in the process steps then you can Download this project from here. And check out all the files and settings.
Admin: admin@gmail.com
Password: password
User: user@gmail.com
Password: password
Congratulations! You’ve created it.
I hope it can help you...
#Laravel 10