27-Nov-2023
.
Admin
Hello Dev,
In the world of software and applications, our desires are rooted in convenience, user-friendliness, and state-of-the-art functionalities. Given a choice without budget constraints, there's an inherent inclination towards the newest and most advanced versions—opting for Windows 12 over Windows 8 or the iPhone 14 in favor of the iPhone 5.
As users, our quest revolves around applications that embrace cutting-edge technologies, updated iterations, and refined designs to offer an enriched UI/UX experience. With the rise of AI and Machine Learning, there's an increasing call to integrate ChatGPT across diverse platforms, meeting the burgeoning demand for intelligent conversational interfaces.
Step 1: Initializing a New Laravel Project
Begin by creating a new Laravel project using the following command:
composer create-project laravel/laravel gptlara
Step 2: Installing Guzzle HTTP Client
Next, install the Guzzle HTTP client by executing this command:
composer require guzzlehttp/guzzle
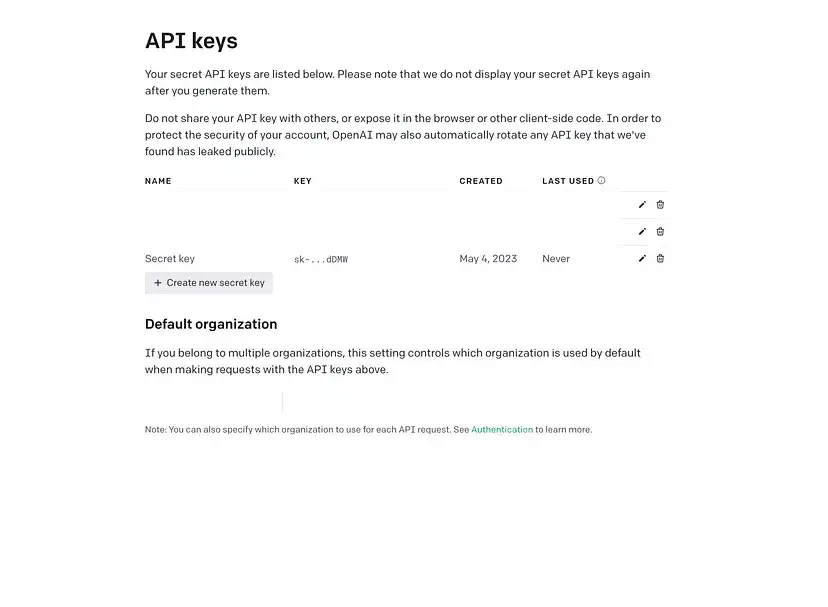
Step 3: Obtaining an API Key from ChatGPT
To access the ChatGPT API, acquire an API key. Sign up and generate a secret key from OpenAI's platform.
Example secret key: example-secret-key
Step 4: Generating a New Controller
In Laravel, controllers manage HTTP requests and responses. Create a new controller via this command:
php artisan make:controller ChatController
Step 5: Implementing a Method to Interact with ChatGPT API
Within the ChatController class, insert a method that interacts with the ChatGPT API using Guzzle HTTP client. Here's an example snippet:
<?php

namespace App\Http\Controllers\Admin;

use App\Http\Controllers\Controller;
use Illuminate\Http\Request;

class ChatController extends Controller
{
    /**
     * Write Your Code..
     *
     * @return string
    */
    public function chat(Request $request)
    {
        $message = 'Hello!';

        // Guzzle client initialization
        $client = new Client();
        $url = 'https://api.openai.com/v1/chat/completions';

        $headers = [
            'Content-Type' => 'application/json',
            'Authorization' => 'Bearer ' . env('OPENAI_API_KEY'),
        ];

        $body = [
            'model' => 'gpt-3.5-turbo',
            'messages' => [['role' => 'user', 'content' => $message]],
        ];

        // Sending a POST request to ChatGPT API
        $response = $client->post($url, [
            'headers' => $headers,
            'json' => $body,
        ]);

        // Processing API response and returning JSON
        $result = json_decode($response->getBody()->getContents(), true);
        return response()->json($result['choices'][0]['message']['content']);
    }
}
Step 6: Adding a Route to the Controller Method
In the routes/api.php file, create a route that links to the chat method in the ChatController class:
<?php

use Illuminate\Support\Facades\Route;

use App\Http\Controllers\ChatController;

/*
|--------------------------------------------------------------------------
| Web Routes
|--------------------------------------------------------------------------
|
| Here is where you can register web routes for your application. These
| routes are loaded by the RouteServiceProvider within a group which
| contains the "web" middleware group. Now create something great!
|
*/

Route::post('/chat', [ChatController::class, 'chat']);
Step 7: Testing the API Using Postman
To test the API, use Postman to send a POST request to the /chat endpoint with a message parameter. An example is as follows:
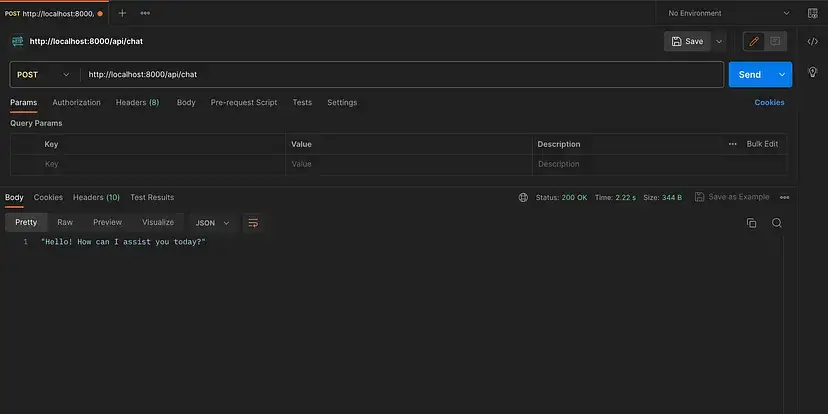
Upon successful interaction, the API should return a JSON object containing the response from the ChatGPT API.
That's it! You've now effectively integrated the ChatGPT API with Laravel. For a sample code, refer to this repository.
Feel free to give this a thumbs-up if you found it helpful!
I hope it can help you...
#Laravel 10
