10-Apr-2023
.
Admin
Hi Dev,
Today, laravel 7 file upload with validation is our main topic. We will use laravel 7 file upload example. This article goes in detailed on how to file upload in laravel 7. This tutorial will give you simple example of laravel 7 file upload example.
I will learn you how to store file with validation in laravel 7. I will add validation with file upload in laravel 7.I will add file upload validation like file, mimes, max file upload etc, So you can easily understand and you it simply.In this blog made easy to upload the file to the folder and store into the database in the laravel 7.
You can upload file into folder and database with laravel validation as bellow.
We will Follow the bellow step.
Step 1 : Install Laravel project
In this step you can install fresh laravel project to using bellow command.
composer create-project --prefer-dist laravel/laravel blog
Step 2 : Create Migration & Model
Now you will bellow command to create migration and model in laravel app.
php artisan make:model File -m
Above command to create one table migration file and one model file.
database/migrations/2020_02_03_111847_create_file_table.php
<?php

use Illuminate\Database\Migrations\Migration;
use Illuminate\Database\Schema\Blueprint;
use Illuminate\Support\Facades\Schema;

class CreateFilesTable extends Migration
{
    /**
     * Run the migrations.
     *
     * @return void
     */
    public function up()
    {
        Schema::create('files', function (Blueprint $table) {
            $table->id();
            $table->string('file');
            $table->timestamps();
        });
    }

    /**
     * Reverse the migrations.
     *
     * @return void
     */
    public function down()
    {
        Schema::dropIfExists('files');
    }
}
Bellow command to use migrate your table.
php artisan migrate
After add following code for a model fille:
app/File.php
<?php

namespace App;

use Illuminate\Database\Eloquent\Model;

class File extends Model
{
     /**
     * The attributes that are mass assignable.
     *
     * @var array
     */
    protected $fillable = [
      'file'
    ];
}
Step 3 : Create Controller
In this step create controler file to use bellow command.
php artisan make:controller FileController
Step 4 : Create Controller method
Create controller after you can put the bellow code in controller file.
app/http/controllers/FileController
<?php

namespace App\Http\Controllers;

use Illuminate\Http\Request;
use App\File;

class FileController extends Controller
{
    public function index()
    {
        return view('fileUpload');
    }

    public function store(Request $request)
    {
        $request->validate([
            'file' => 'required',
        ]);
        $input = $request->all();
        $file = $request->file('file');
        $input['file'] = $file->getClientOriginalName();
        $file->move(public_path('upload'),$file->getClientOriginalName());
        File::create(['file' => $input['file']]);

        return redirect()->back()->with('success', 'success Full file upload');;

    }
}
Step 5 : Create Routes
In this step you will create route in web.php file.
routes/web.php
Route::get('file','FileController@index');
Route::post('file','FileController@store')->name('file.store');
Step 6 : Create View File
In this step you can create blade file in laravel app.
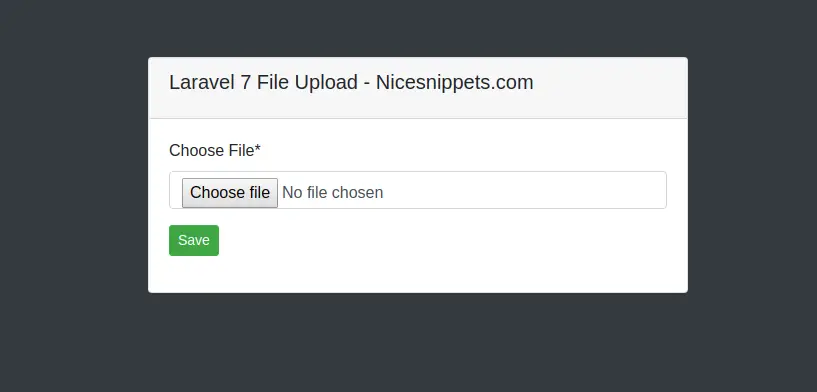
resources/views/create.blade.php
<!DOCTYPE html>
<html>
<head>
    <title>Laravel 7 File Upload - Nicesnippets.com</title>
    <link rel="stylesheet" href="https://stackpath.bootstrapcdn.com/bootstrap/4.3.1/css/bootstrap.min.css" integrity="sha384-ggOyR0iXCbMQv3Xipma34MD+dH/1fQ784/j6cY/iJTQUOhcWr7x9JvoRxT2MZw1T" crossorigin="anonymous">
    <link rel="stylesheet" href="https://cdnjs.cloudflare.com/ajax/libs/font-awesome/4.7.0/css/font-awesome.css" integrity="sha256-NuCn4IvuZXdBaFKJOAcsU2Q3ZpwbdFisd5dux4jkQ5w=" crossorigin="anonymous" />
    <script src="https://code.jquery.com/jquery-3.3.1.slim.min.js" integrity="sha384-q8i/X+965DzO0rT7abK41JStQIAqVgRVzpbzo5smXKp4YfRvH+8abtTE1Pi6jizo" crossorigin="anonymous"></script>
    <script src="https://cdnjs.cloudflare.com/ajax/libs/popper.js/1.14.7/umd/popper.min.js" integrity="sha384-UO2eT0CpHqdSJQ6hJty5KVphtPhzWj9WO1clHTMGa3JDZwrnQq4sF86dIHNDz0W1" crossorigin="anonymous"></script>
    <script src="https://stackpath.bootstrapcdn.com/bootstrap/4.3.1/js/bootstrap.min.js" integrity="sha384-JjSmVgyd0p3pXB1rRibZUAYoIIy6OrQ6VrjIEaFf/nJGzIxFDsf4x0xIM+B07jRM" crossorigin="anonymous"></script>
</head>
<body class="bg-dark">
    <div class="container">
        <div class="row mt-5">
            <div class="col-md-6 offset-3">
                <div class="card">
                    <div class="card-header">
                        <h5 class=" card-title">Laravel 7 File Upload - Nicesnippets.com</h5>
                    </div>
                    <div class="card-body">
                        @if (count($errors) > 0)
                            @foreach($errors->all() as $error)
                               <div class="alert alert-danger">{{ $error }} </div>
                            @endforeach
                        @endif
                           @if ($message = Session::get('success'))
                        <div class="alert alert-success  alert-dismissible">
                                <button type="button" class="close" data-dismiss="alert">×</button>
                                <strong>{{ $message }}</strong>
                            </div>
                        @endif
                        <form action="{{ route('file.store') }}" method="post" enctype="multipart/form-data">
                            @csrf
                            <div class="form-group">
                                <label>Choose File*</label>
                                <input type="file" name="file" class="form-control">
                            </div>
                            <div class="form-group" class="text-center">
                                <button class="btn btn-success btn-sm">Save</button>
                            </div>
                        </form>
                    </div>
                </div>
            </div>
        </div>
    </div>
</body>
</html>
After A create on folder in public in "upload" name folder
Now we are ready to run our example so run bellow command for quick run:
php artisan serve
Now you can open bellow URL on your browser:
http://localhost:8000/file
It will help you...
#Laravel 7
#Laravel