26-Apr-2024
.
Admin

Hi, Dev
In this guide, we'll delve into integrating the Razorpay payment gateway within your Laravel 11 application.
Razorpay stands as a leading Indian online payment gateway provider, catering to businesses of various scales since its inception in 2014. Renowned for its array of payment processing solutions, Razorpay swiftly earned its place as one of India's most favored payment gateway services. Offering a seamless and secure platform, Razorpay facilitates the acceptance of online payments via diverse channels including credit cards, debit cards, net banking, UPI, and digital wallets. Moreover, it extends effortless integration capabilities with popular e-commerce platforms like Shopify, WooCommerce, Magento, among others.
In this demonstration, we'll initiate the integration of the "razorpay/razorpay" composer package to harness the payment API. Our objective is to create a straightforward process wherein users can make payments by clicking a "Pay 10 INR" button. Upon successful payment, users will receive a confirmation message on the page. Let's proceed with the following steps:
Preview:
Step for How to use Razorpay Payment Gateway in Laravel 11?
Step 1: Install Laravel 11
Step 2: Create Razorpay Account
Step 3: Install razorpay/razorpay Package
Step 4: Create Route
Step 5: Create Controller
Step 6: Create Blade File
Run Laravel App
Step 1: Install Laravel 11
This step is not required; however, if you have not created the Laravel app, then you may go ahead and execute the below command:
composer create-project laravel/laravel example-app
Step 2: Create Razorpay Account
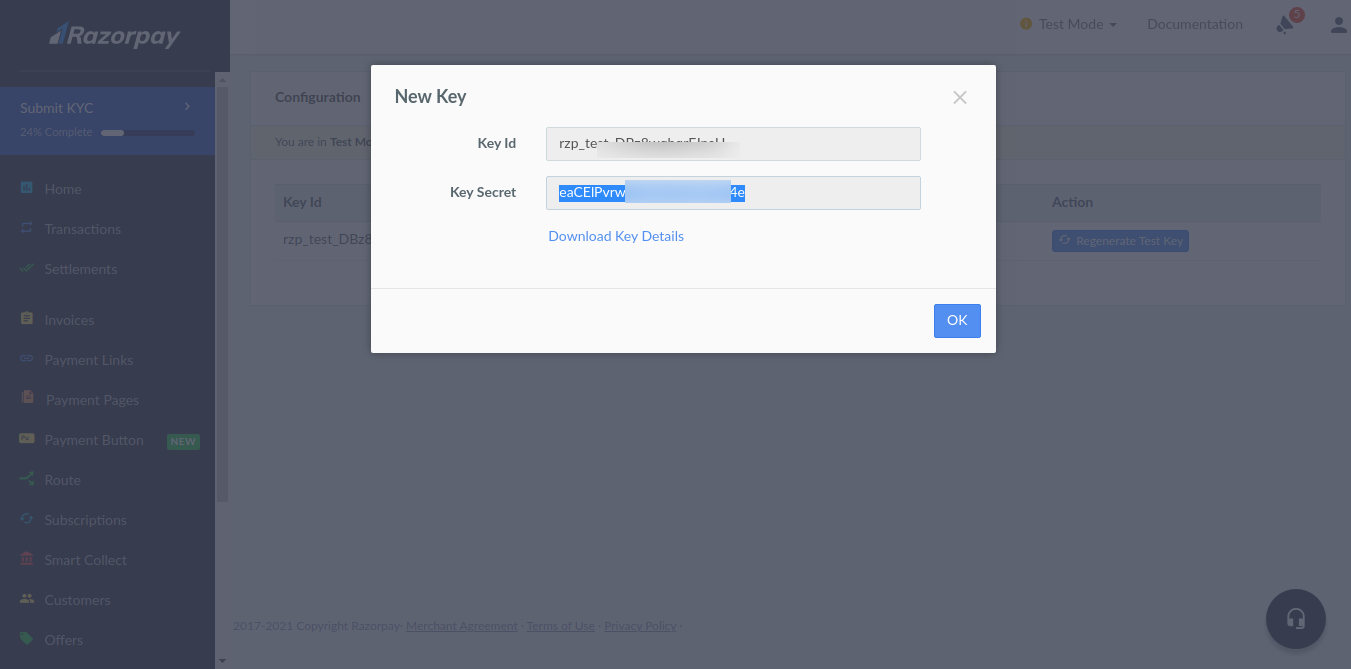
First you need to create account on razorpay. then you can easily get account key id and key secret.
Create Account from here: www.razorpay.com.
After register successfully. you need to go bellow link and get id and secret as bellow screen shot:
Go Here: https://dashboard.razorpay.com/app/keys.

Next you can get account key id and secret and add on .env file as like bellow:
.env
RAZORPAY_KEY=rzp_test_XXXXXXXXX
RAZORPAY_SECRET=XXXXXXXXXXXXXXXX
Step 3: Install razorpay/razorpay Package
In this step, we need to install the Razorpay/Razorpay Composer package to use the Razorpay API. So let's run the below command:
composer require razorpay/razorpay
Step 4: Create Route
Now we will create one route for calling our example, so let's add a new route to the web.php file as below:
routes/web.php
<?php

use Illuminate\Support\Facades\Route;

use App\Http\Controllers\RazorpayPaymentController;

Route::get('razorpay-payment', [RazorpayPaymentController::class, 'index']);
Route::post('razorpay-payment', [RazorpayPaymentController::class, 'store'])->name('razorpay.payment.store');
Step 5: Create Controller
In this step, we will create RazorpayPaymentController and write send SMS logic, so let's add a new route to the web.php file as below:
app/Http/Controllers/RazorpayPaymentController.php
<?php

namespace App\Http\Controllers;

use Illuminate\Http\Request;
use Razorpay\Api\Api;
use Exception;
use Illuminate\View\View;
use Illuminate\Http\RedirectResponse;

class RazorpayPaymentController extends Controller
{
    /**
     * Write code on Method
     *
     * @return response()
     */
    public function index(): View
    {
        return view('razorpay');
    }

    /**
     * Write code on Method
     *
     * @return response()
     */
    public function store(Request $request): RedirectResponse
    {
        $input = $request->all();

        $api = new Api(env('RAZORPAY_KEY'), env('RAZORPAY_SECRET'));

        $payment = $api->payment->fetch($input['razorpay_payment_id']);

        if(!empty($input['razorpay_payment_id'])) {

            try {
                $response = $api->payment->fetch($input['razorpay_payment_id'])
                                         ->capture(['amount'=>$payment['amount']]);

            } catch (Exception $e) {
                return redirect()->back()
                                 ->with('error', $e->getMessage());
            }

        }

        return redirect()->back()
                         ->with('success', 'Payment successful');
    }
}
Step 6: Create Blade File
Now we need to add a Blade file. So let's create a `razorpay.blade.php` file and put the code below:
resources/views/razorpay.blade.php
<!DOCTYPE html>
<html>
<head>
    <meta charset="utf-8">
    <meta name="viewport" content="width=device-width, initial-scale=1">
    <title>How to Razorpay Payment Gateway Integration in Laravel 11?-NiceSnippets.com</title>
    <script src="https://cdnjs.cloudflare.com/ajax/libs/jquery/3.6.0/jquery.min.js" crossorigin="anonymous"></script>
    <link href="https://cdn.jsdelivr.net/npm/bootstrap@5.0.2/dist/css/bootstrap.min.css" rel="stylesheet" crossorigin="anonymous">
</head>
<body>

<div class="container">

    <div class="card mt-5">
        <h3 class="card-header p-3">How to Razorpay Payment Gateway Integration in Laravel 11? -NiceSnippets.com</h3>
        <div class="card-body">

            @session('error')
                <div class="alert alert-danger" role="alert">
                    {{ $value }}
                </div>
            @endsession

            @session('success')
                <div class="alert alert-success" role="alert">
                    {{ $value }}
                </div>
            @endsession

            <form action="{{ route('razorpay.payment.store') }}" method="POST" class="text-center">
                @csrf
                <script src="https://checkout.razorpay.com/v1/checkout.js"
                        data-key="{{ env('RAZORPAY_KEY') }}"
                        data-amount="1000"
                        data-buttontext="Pay 10 INR"
                        data-name="NiceSnippets.com"
                        data-description="Rozerpay"
                        data-image="https://www.NiceSnippets.com/frontTheme/images/logo.png"
                        data-prefill.name="name"
                        data-prefill.email="email"
                        data-theme.color="#ff7529">
                </script>
            </form>
        </div>
    </div>
</div>
</body>
</html>
Run Laravel App:
All the required steps have been done, now you have to type the given below command and hit enter to run the Laravel app:
php artisan serve
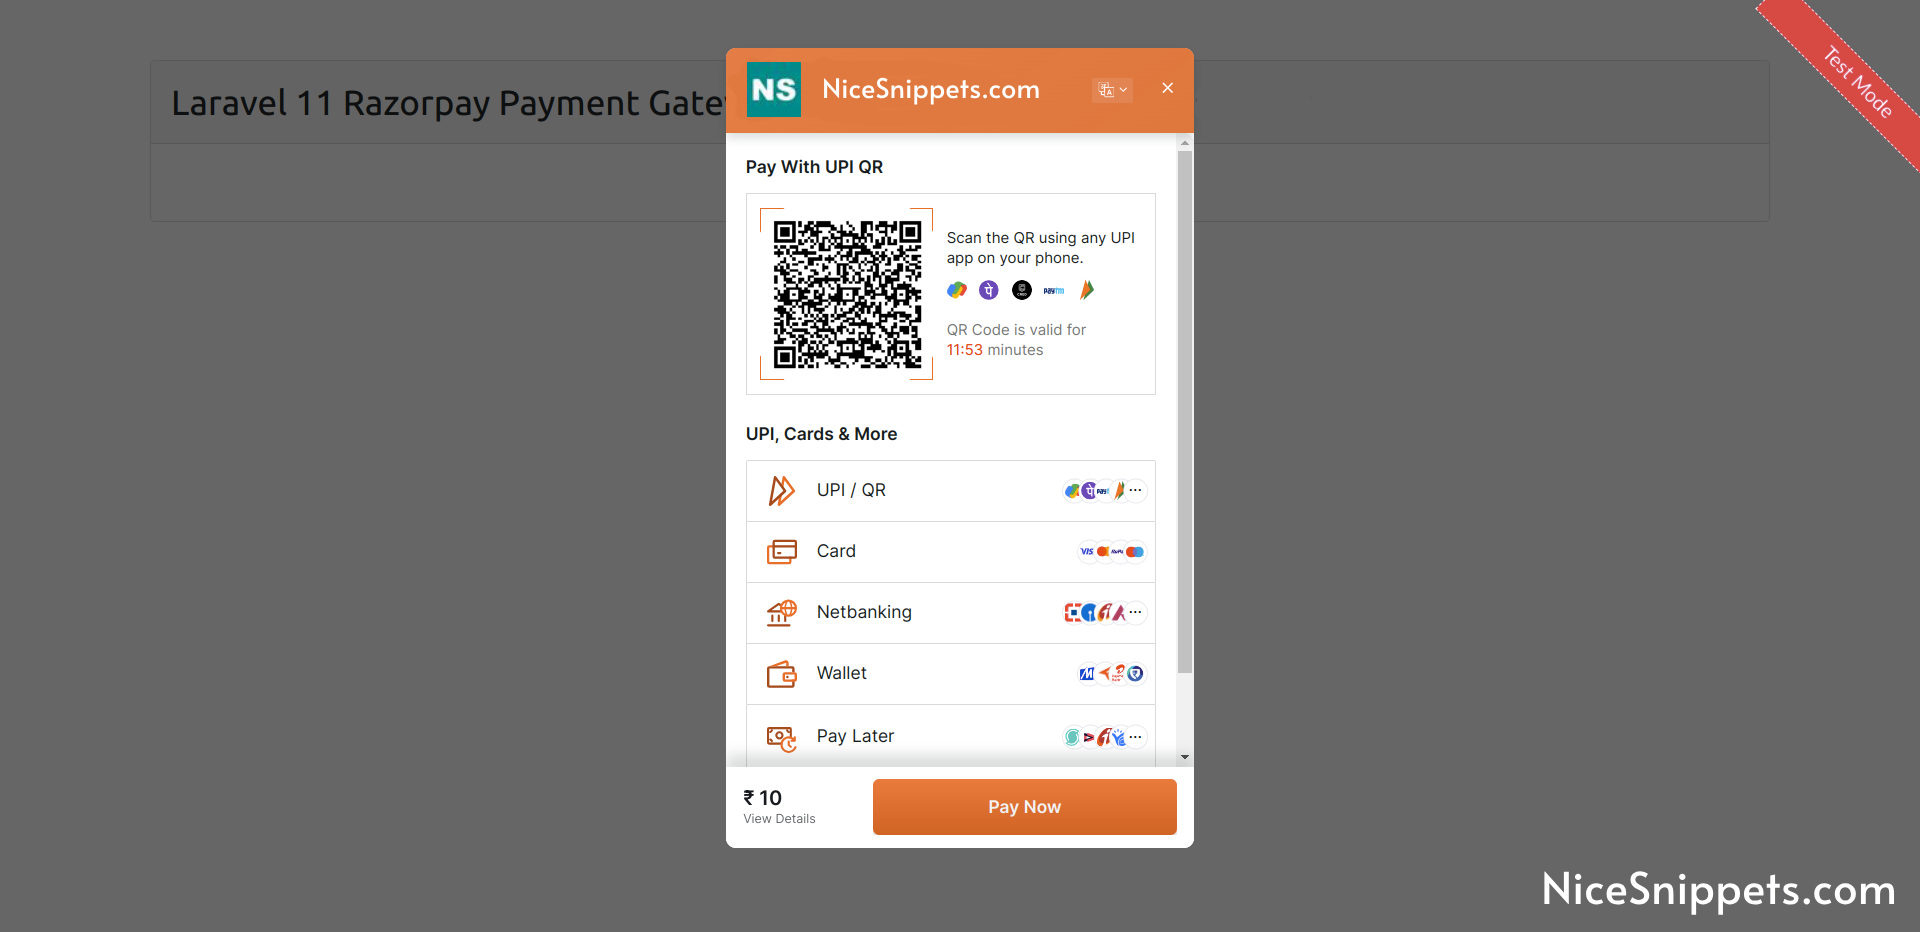
Now, Go to your web browser, type the given URL and view the app output:
http://localhost:8000/razorpay-payment
Output:

you can get testing card for razorpay from here: Click Here
Now you can run and check.
I hope it can help you...
#Laravel 11