14-May-2024
.
Admin

Hi, Dev
In this guide, I'll demonstrate how to integrate image uploading functionality using CKEditor within a Laravel 11 application.
CKEditor stands as a web-based, open-source WYSIWYG (What You See Is What You Get) editor, empowering users to manipulate text content directly within a browser. It's a versatile tool, facilitating text formatting, multimedia integration, and HTML code editing without requiring coding expertise. Since its inception in 2003, CKEditor has gained widespread adoption among web developers and content creators for its user-friendly interface and robust capabilities. Developed in JavaScript, it seamlessly integrates into any web application.
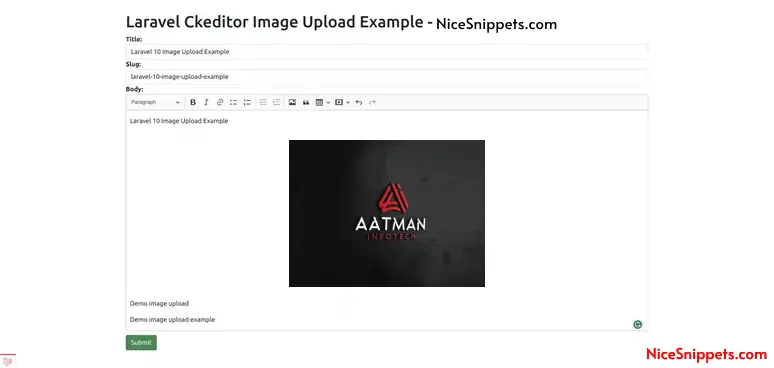
In this walkthrough, we'll craft a basic CKEditor instance featuring an image upload functionality that saves images to local storage. To achieve this, we'll establish two routes: one for handling GET requests and another for processing POST requests related to image uploads. Upon selecting an image and submitting it, the image will be securely stored within the 'media' directory.
So, let's delve into the steps required to accomplish image uploads in CKEditor within a Laravel environment.
Step for File Upload with CKeditor in Laravel 11
Step 1: Install Laravel 11
Step 2: Create Route
Step 3: Create Controller
Step 4: Create View File
Run Laravel App
Step 1: Install Laravel 11
First of all, we need to get a fresh Laravel 11 version application using the command below because we are starting from scratch. So, open your terminal or command prompt and run the command below:
composer create-project laravel/laravel example-app
Step 2: Create Route
In this step, we will add three routes with GET and POST method in routes/web.php file. so let's add it.
routes/web.php
<?php

use Illuminate\Support\Facades\Route;

use App\Http\Controllers\CkeditorController;

Route::get('ckeditor', [CkeditorController::class, 'index']);
Route::post('ckeditor/upload', [CkeditorController::class, 'upload'])->name('ckeditor.upload');
Step 3: Create Controller
In this step, we have to create new controller as CkeditorController with index() and update() methods.
Make sure you have created media folder in your public directory because images will store on that folder.
so let's update follow code:
app/Http/Controllers/CkeditorController.php
<?php

namespace App\Http\Controllers;

use Illuminate\Http\Request;
use Illuminate\View\View;
use Illuminate\Http\JsonResponse;

class CkeditorController extends Controller
{
    /**
     * Write code on Method
     *
     * @return response()
     */
    public function index(): View
    {
        return view('ckeditor');
    }

    /**
     * Write code on Method
     *
     * @return response()
     */
    public function upload(Request $request): JsonResponse
    {
        if ($request->hasFile('upload')) {
            $originName = $request->file('upload')->getClientOriginalName();
            $fileName = pathinfo($originName, PATHINFO_FILENAME);
            $extension = $request->file('upload')->getClientOriginalExtension();
            $fileName = $fileName . '_' . time() . '.' . $extension;

            $request->file('upload')->move(public_path('media'), $fileName);

            $url = asset('media/' . $fileName);

            return response()->json(['fileName' => $fileName, 'uploaded'=> 1, 'url' => $url]);
        }
    }
}
Step 4: Create View File
In Last step, let's create ckeditor.blade.php for display form with CkEditor and put following code:
resources/views/ckeditor.blade.php
<!DOCTYPE html>
<html>
<head>
    <title>How to CKeditor Image Upload in Laravel 11? - NiceSnippets.com</title>
    <link href="https://cdn.jsdelivr.net/npm/bootstrap@5.0.2/dist/css/bootstrap.min.css" rel="stylesheet">
	<style>
    	.ck-editor__editable_inline {
        	min-height: 300px;
    	}
    </style>
</head>
<body>

<div class="container">

    <div class="card mt-5">
        <h3 class="card-header p-3">How to CKeditor Image Upload in Laravel 11? - NiceSnippets.com</h3>
        <div class="card-body">
            <form>

                <div class="form-group">
                    <strong>Title:</strong>
                    <input type="text" name="title" class="form-control" placeholder="Title" value="{{ old('title') }}">
                </div>

                <div class="form-group">
                    <strong>Slug:</strong>
                    <input type="text" name="slug" class="form-control" placeholder="Slug" value="{{ old('slug') }}">
                </div>

                <div class="form-group">
                    <strong>Body:</strong>
                    <textarea name="editor" id="editor"></textarea>
                </div>

                <div class="form-group mt-2">
                    <button class="btn btn-success" type="submit">Submit</button>
                </div>

            </form>
        </div>
    </div>
</div>

<script src="https://cdn.ckeditor.com/ckeditor5/34.2.0/classic/ckeditor.js"></script>
<script>
    ClassicEditor
        .create( document.querySelector( '#editor' ),{
            ckfinder: {
                uploadUrl: '{{route('ckeditor.upload').'?_token='.csrf_token()}}',
            }
        }).catch( error => {} );
</script>

</body>
</html>
Run Laravel App:
All the required steps have been done, now you have to type the given below command and hit enter to run the Laravel app:
php artisan serve
Now, Go to your web browser, type the given URL and view the app output:
Output:
I hope it can help you...
#Laravel 11
