10-Jun-2024
.
Admin
Hi, Dev
In this tutorial, I'll guide you through integrating the PayPal payment gateway into a Laravel 11 application.
In this example, we'll demonstrate a straightforward method to integrate the PayPal payment gateway into a Laravel application using the srmklive/paypal composer package. We'll start by creating a new developer account to obtain a client ID and secret. Next, we'll set up the intent to capture payments, enabling users to make transactions using a PayPal sandbox buyer account. I'll guide you through each step of the Laravel PayPal Payment Gateway integration process.
Let's now proceed to the step-by-step example of integrating PayPal payments in Laravel.
Step for Laravel 11 PayPal Payment Gateway Integration
Step 1: Install Laravel 11
Step 2: Create PayPal Developer Account
Step 3: Install srmklive/paypal Package
Step 4: Create Route
Step 5: Create Controller
Step 6: Create Blade File
Run Laravel App
Step 1: Install Laravel
To begin, we must obtain the latest version of the Laravel application by executing the command stated below. Open your terminal or command prompt and enter the given command.
composer create-project laravel/laravel example-app
Step 2: Create PayPal Developer Account
First you need to create PayPal Developer account and create app inside that account.
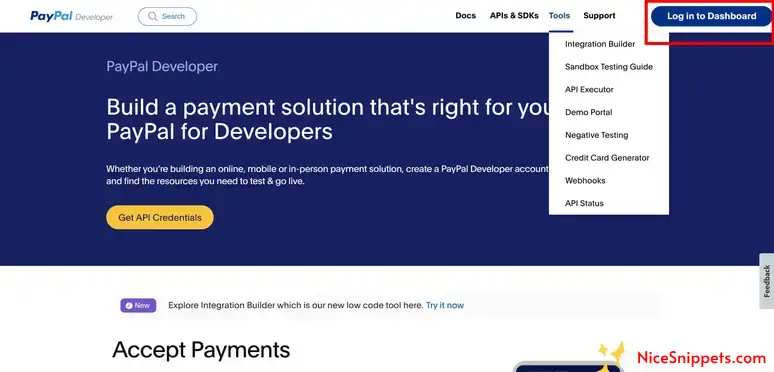
Create Account from here: developer.paypal.com.
1. Click to "Login in to Dashboard", If you don't have account with paypal then create new:
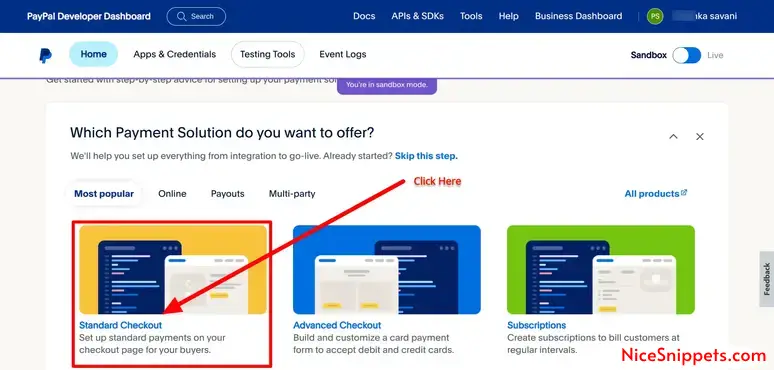
2. Next, Click on "Standard Checkout" button to create new developer app.
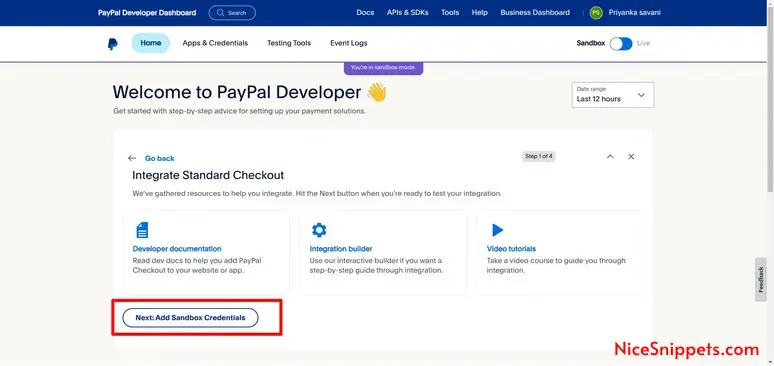
3. Next, Click on "Add Sandbox Credentials" and generate new credentials.
4. Next, Copy the client id and secret, Then click on test card button.
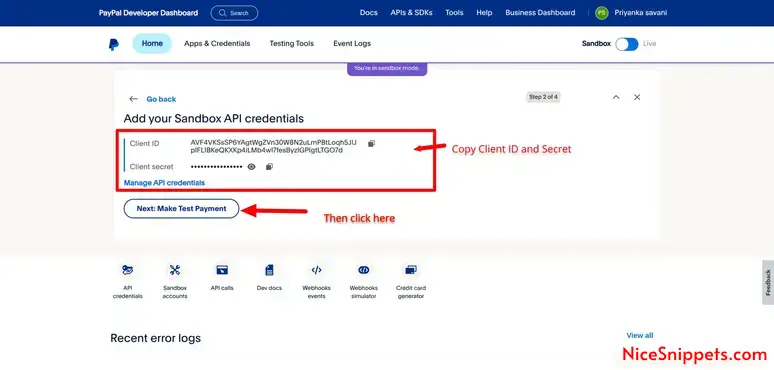
Next you need to add PAYPAL_MODE, PAYPAL_SANDBOX_CLIENT_ID and PAYPAL_SANDBOX_CLIENT_SECRET on .env file as like bellow:
.env
PAYPAL_MODE=sandbox
PAYPAL_SANDBOX_CLIENT_ID=YourClientKey
PAYPAL_SANDBOX_CLIENT_SECRET=YourClientSecret
Step 3: Install srmklive/paypal Package
In this step, we need to install srmklive/paypal composer package to use PayPal api. so let's run bellow command:
composer require srmklive/paypal
Step 4: Create Route
now we will create one route for calling our example, so let's add new route to web.php file as bellow:
routes/web.php
<?php

use Illuminate\Support\Facades\Route;

use App\Http\Controllers\PayPalController;

Route::get('paypal', [PayPalController::class, 'index'])->name('paypal');
Route::get('paypal/payment', [PayPalController::class, 'payment'])->name('paypal.payment');
Route::get('paypal/payment/success', [PayPalController::class, 'paymentSuccess'])->name('paypal.payment.success');
Route::get('paypal/payment/cancel', [PayPalController::class, 'paymentCancel'])->name('paypal.payment/cancel');
Step 5: Create Controller
in this step, we will create PayPalController and write payment logic, so let's add new route to web.php file as bellow:
app/Http/Controllers/PayPalController.php
<?php

namespace App\Http\Controllers;

use Srmklive\PayPal\Services\PayPal as PayPalClient;
use Illuminate\Http\Request;

class PayPalController extends Controller
{
    /**
     * Write code on Method
     *
     * @return response()
     */
    public function index()
    {
        return view('paypal');
    }

    /**
     * Write code on Method
     *
     * @return response()
     */
    public function payment(Request $request)
    {
        $provider = new PayPalClient;
        $provider->setApiCredentials(config('paypal'));
        $paypalToken = $provider->getAccessToken();

        $response = $provider->createOrder([
            "intent" => "CAPTURE",
            "application_context" => [
                "return_url" => route('paypal.payment.success'),
                "cancel_url" => route('paypal.payment/cancel'),
            ],
            "purchase_units" => [
                0 => [
                    "amount" => [
                        "currency_code" => "USD",
                        "value" => "100.00"
                    ]
                ]
            ]
        ]);

        if (isset($response['id']) & $response['id'] != null) {

            foreach ($response['links'] as $links) {
                if ($links['rel'] == 'approve') {
                    return redirect()->away($links['href']);
                }
            }

            return redirect()
                ->route('cancel.payment')
                ->with('error', 'Something went wrong.');

        } else {
            return redirect()
                ->route('create.payment')
                ->with('error', $response['message'] ?? 'Something went wrong.');
        }

    }

    /**
     * Write code on Method
     *
     * @return response()
     */
    public function paymentCancel()
    {
        return redirect()
              ->route('paypal')
              ->with('error', $response['message'] ?? 'You have canceled the transaction.');
    }

    /**
     * Write code on Method
     *
     * @return response()
     */
    public function paymentSuccess(Request $request)
    {
        $provider = new PayPalClient;
        $provider->setApiCredentials(config('paypal'));
        $provider->getAccessToken();
        $response = $provider->capturePaymentOrder($request['token']);

        if (isset($response['status']) & $response['status'] == 'COMPLETED') {
            return redirect()
                ->route('paypal')
                ->with('success', 'Transaction complete.');
        } else {
            return redirect()
                ->route('paypal')
                ->with('error', $response['message'] ?? 'Something went wrong.');
        }
    }
}
Step 6: Create Blade File
here, we need to create paypal.blade.php file and update following code on it.
resources/views/auth/paypal.blade.php
<!DOCTYPE html>
<html>
<head>
    <meta charset="utf-8">
    <meta name="viewport" content="width=device-width, initial-scale=1">
    <title>Laravel PayPal Payment Gateway Integration Example - NiceSnippets.com</title>
    <link href="https://cdn.jsdelivr.net/npm/bootstrap@5.0.2/dist/css/bootstrap.min.css" rel="stylesheet">
</head>
<body>
<div class="container">
    <div class="row mt-5 mb-5">
        <div class="col-10 offset-1 mt-5">
            <div class="card">
                <div class="card-header bg-primary">
                    <h3 class="text-white">Laravel PayPal Payment Gateway Integration Example - NiceSnippets.com</h3>
                </div>
                <div class="card-body">

                    @if ($message = Session::get('success'))
                      <div class="alert alert-success alert-dismissible fade show" role="alert">
                        <strong>{{ $message }}</strong>
                        <button type="button" class="btn-close" data-bs-dismiss="alert" aria-label="Close"></button>
                      </div>
                    @endif

                    @if ($message = Session::get('error'))
                        <div class="alert alert-danger alert-dismissible fade show" role="alert">
                          <strong>{{ $message }}</strong>
                          <button type="button" class="btn-close" data-bs-dismiss="alert" aria-label="Close"></button>
                        </div>
                    @endif

                    <center>
                        <a href="{{ route('paypal.payment') }}" class="btn btn-success">Pay with PayPal </a>
                    </center>

                </div>
            </div>
        </div>
    </div>
</div>
</body>
</html>
Run Laravel App:
All the required steps have been done, now you have to type the given below command and hit enter to run the Laravel app:
php artisan serve
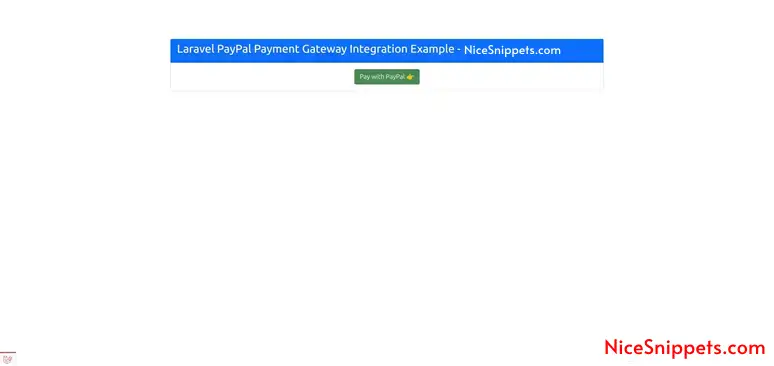
Now, Go to your web browser, type the given URL and view the app output:
http://localhost:8000/paypal
Now, you will see the following output:
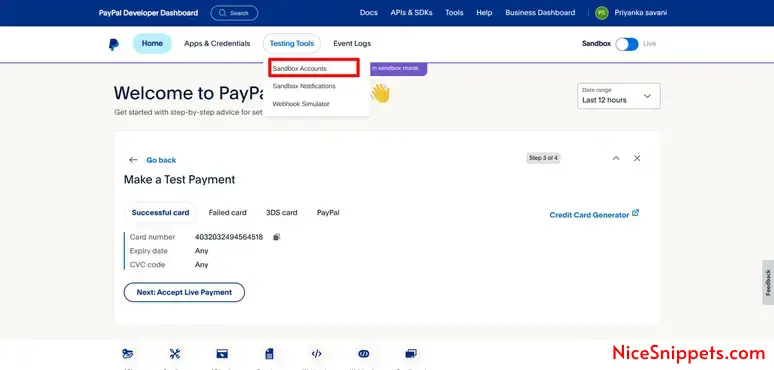
Next, we need to create "PayPal" buyer account, so you can pay them, After click on pay button you need to login to buyer account and make payment. so here, i will show you how to create buyer account. with following screenshot:
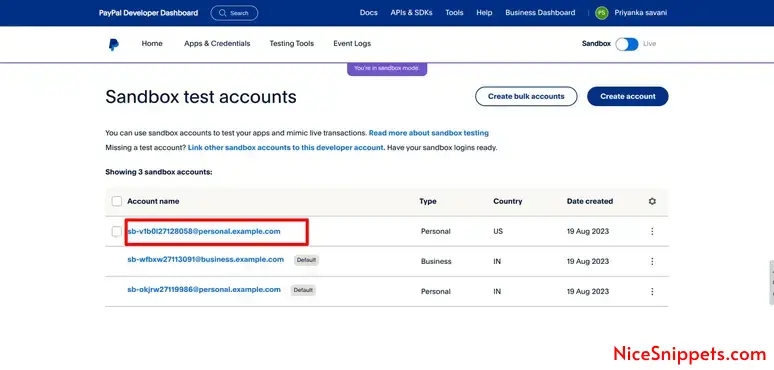
1. click on Sendbox Accounts:
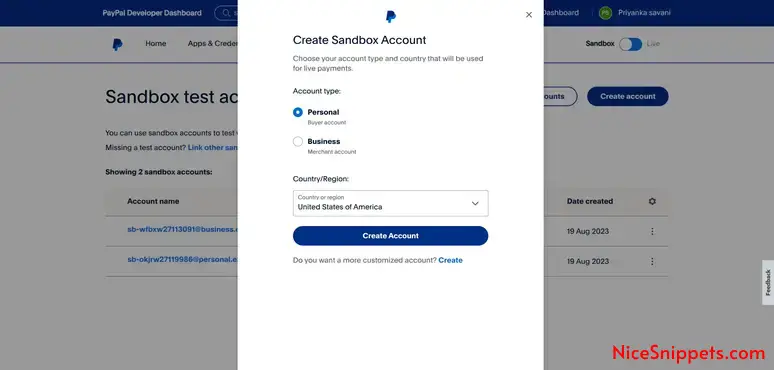
2. Click on Create Account button:
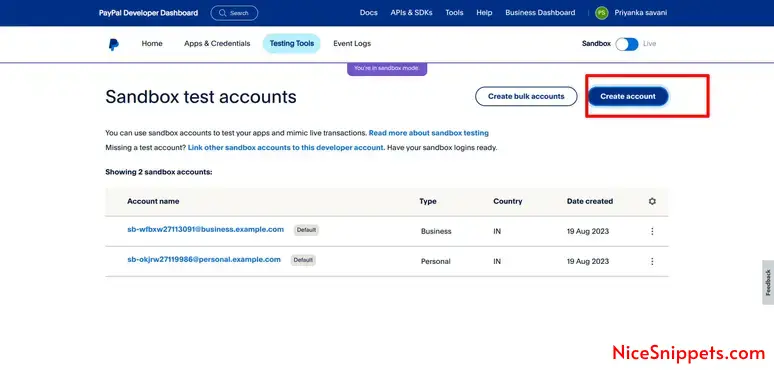
3. Click on Submit Button:
4. Click on Created Buyer Email:
5. Next, take email and password:
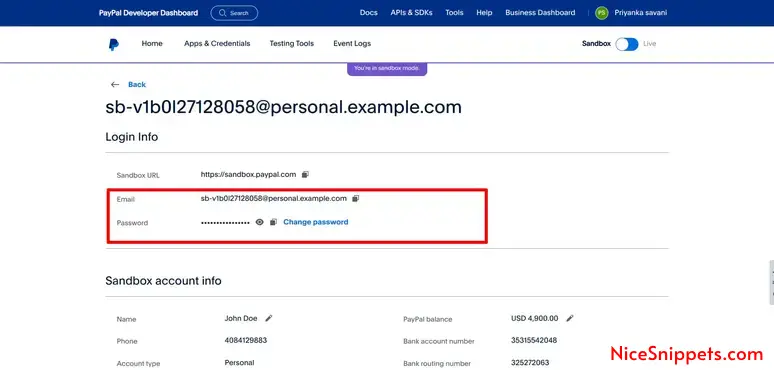
Now, you are ready to make payment.
Add buyer email and password then you will find following screen to make payment:
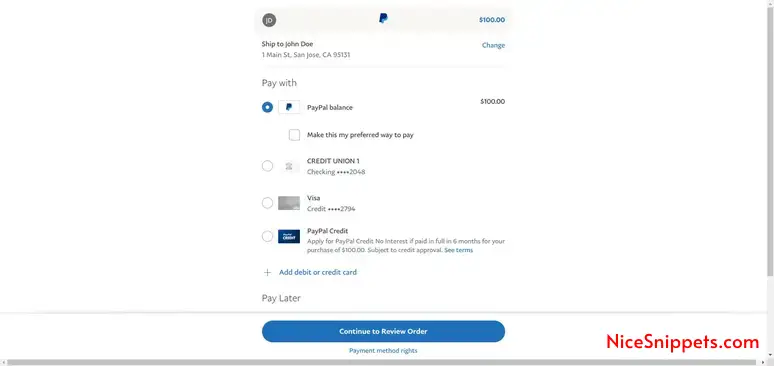
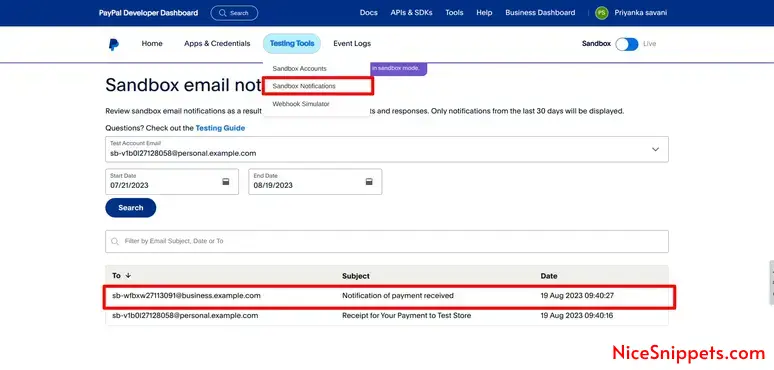
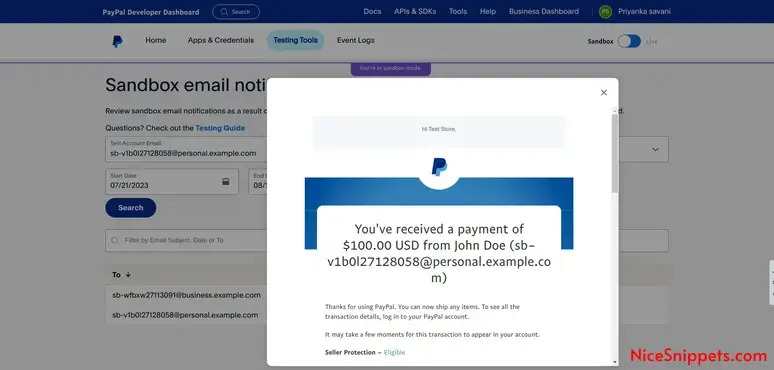
Now, you can see the payment done screen:
Now, it's done...
I hope it can help you...
#Laravel 11
