16-May-2024
.
Admin

Hi, Dev
In this guide, we'll delve into crafting a form and executing submissions with Livewire within the Laravel 11 framework.
Livewire serves as a comprehensive solution within the Laravel ecosystem, facilitating the creation of dynamic interfaces seamlessly integrated with Laravel. With Livewire, the need for crafting jQuery AJAX code diminishes, as it streamlines the process using PHP. This means effortless implementation of features like Laravel validation and form submissions without page refresh.
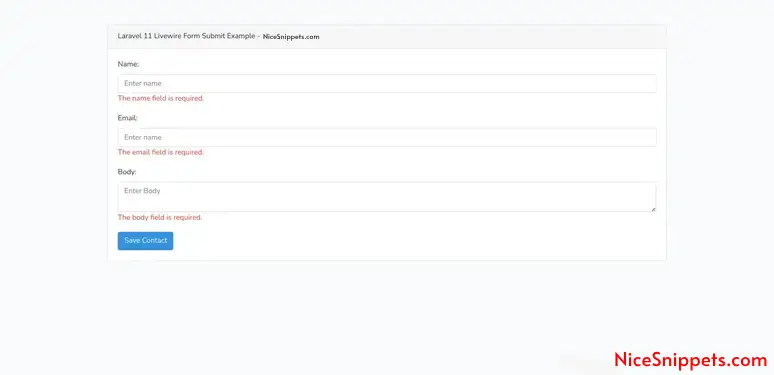
Let's explore a straightforward example: building a contact form with fields for name and email. We'll demonstrate storing this data in the database without page refresh, all accomplished with minimal lines of code in the blade file, utilizing solely the Livewire/Livewire package.
Step for Laravel 11 Form Submit Example
Step 1: Install Laravel 11
Step 2: Create Migration and Model
Step 3: Install Livewire
Step 4: Create Component
Step 5: Create Route
Step 6: Create View File
Run Laravel App
Step 1: Install Laravel 11
First of all, we need to get a fresh Laravel 11 version application using the command below because we are starting from scratch. So, open your terminal or command prompt and run the command below:
composer create-project laravel/laravel example-app
Step 2: Create Migration and Model
Here, we need to create a database migration for the contacts table and also create a model for the contacts table.
php artisan make:migration create_contacts_table
Migration:
<?php

use Illuminate\Database\Migrations\Migration;
use Illuminate\Database\Schema\Blueprint;
use Illuminate\Support\Facades\Schema;

return new class extends Migration
{
    /**
     * Run the migrations.
     *
     * @return void
     */
    public function up(): void
    {
        Schema::create('contacts', function (Blueprint $table) {
            $table->id();
            $table->string('name');
            $table->string('email');
            $table->text('body');
            $table->timestamps();
        });
    }

    /**
     * Reverse the migrations.
     *
     * @return void
     */
    public function down(): void
    {
        Schema::dropIfExists('products');
    }
};
php artisan migrate
now we will create Contact model by using following command:
php artisan make:model Contact
App/Models/Contact.php
<?php

namespace App\Models;

use Illuminate\Database\Eloquent\Factories\HasFactory;
use Illuminate\Database\Eloquent\Model;

class Contact extends Model
{
    use HasFactory;

    /**
     * Write code on Method
     *
     * @return response()
     */
    protected $fillable = [
        'name', 'email', 'body'
    ];
}
Step 3: Install Livewire
Now, in this step, we will simply install Livewire to our Laravel application using the below command:
composer require livewire/livewire
Step 4: Create Component
Now, here we will create a Livewire component using their command. So, run the below command to create the "ContactForm" form component.
php artisan make:livewire contact-form
Now they created fies on both path:
app/Livewire/ContactForm.php

resources/views/livewire/contact-form.blade.php
Now both files we will update as follows for our contact us form.
app/Livewire/ContactForm.php
<?php

namespace App\Livewire;

use Livewire\Component;
use App\Models\Contact;

class ContactForm extends Component
{
    public $name;
    public $email;
    public $body;

  	/**
     * Write code on Method
     *
     * @return response()
     */
    public function submit()
    {
        $validatedData = $this->validate([
            'name' => 'required|min:6',
            'email' => 'required|email',
            'body' => 'required',
        ]);

        Contact::create($validatedData);

        return redirect()->to('/form');
    }

    /**
     * Write code on Method
     *
     * @return response()
     */
    public function render()
    {
        return view('livewire.contact-form');
    }
}
resources/views/livewire/contact-form.blade.php
<form wire:submit.prevent="submit">
    <div class="form-group">
        <label for="exampleInputName">Name</label>
        <input type="text" class="form-control" id="exampleInputName" placeholder="Enter name" wire:model="name">
        @error('name') <span class="text-danger">{{ $message }}</span> @enderror
    </div>

    <div class="form-group">
        <label for="exampleInputEmail">Email</label>
        <input type="text" class="form-control" id="exampleInputEmail" placeholder="Enter name" wire:model="email">
        @error('email') <span class="text-danger">{{ $message }}</span> @enderror
    </div>

    <div class="form-group">
        <label for="exampleInputbody">Body</label>
        <textarea class="form-control" id="exampleInputbody" placeholder="Enter Body" wire:model="body"></textarea>
        @error('body') <span class="text-danger">{{ $message }}</span> @enderror
    </div>

    <button type="submit" class="btn btn-primary">Save Contact</button>
</form>
Step 5: Create Route
Now we will create one route for calling our example, so let's add a new route to web.php file as below:
routes/web.php
<?php

use Illuminate\Support\Facades\Route;

Route::get('/form', function () {
    return view('form');
});
Step 6: Create View File
Here, we will create a Blade file for calling the form route. In this file, we will use @livewireStyles, @livewireScripts, and @livewire('contact-form'). So let's add it.
resources/views/form.blade.php
<!DOCTYPE html>
<html>
<head>
    <title></title>
    @livewireStyles
    <link rel="stylesheet" href="{{ asset('css/app.css') }}">
</head>
<body>

<div class="container">

    <div class="card mt-5">
      <div class="card-header">
        How to use Livewire Form Validation in Laravel 11? - NiceSnippets.com
      </div>
      <div class="card-body">
        @livewire('contact-form')
      </div>
    </div>

</div>

</body>
<script src="{{ asset('js/app.js') }}"></script>
@livewireScripts
</html>
Run Laravel App:
All the required steps have been done, now you have to type the given below command and hit enter to run the Laravel app:
php artisan serve
Open bellow URL:
http://localhost:8000/form
Output:
I hope it can help you...
#Laravel 11
