03-Jul-2024
.
Admin
Hi, Dev
In this article, I will guide you through the process of sending real-time notifications using Pusher in a Laravel 11 application. We'll utilize the Pusher driver to deliver instant notifications via the Echo server in our Laravel 11 project.
What is Pusher?
Pusher is a service that enables applications to deliver real-time updates, such as notifications or live chat messages, to users instantly. It allows developers to implement features that update dynamically without requiring a page refresh. For instance, if you're using an app and messages appear immediately during a chat, Pusher is likely facilitating that instant communication. Essentially, it acts as a bridge between the app and its users, ensuring everything remains live and up-to-date.
Here is what we will do in this example:
1. Create authentication (auth) scaffolding using Laravel UI.
2. Set up two types of users: a super admin and a normal user. We will identify them using an "is_admin" column in the users table.
3. Create a posts table with columns for the title and body.
4. Allow users to create posts with title and body.
5. Once a post is created, the admin will get a realtime notification using pusher. we will create PostCreate Event for send realtime notification.
Here is a preview of the realtime notification list layout:
Step for How to Send Real-Time Notifications with Laravel 11 and Pusher
Step 1: Install Laravel 11
Step 2: Create Auth using Scaffold
Step 3: Create Migrations
Step 4: Create and Update Models
Step 5: Create Pusher App
Step 6: Setup Pusher & Echo Server
Step 7: Create PostCreate Event
Step 8: Create Routes
Step 9: Create Controller
Step 10: Create and Update Blade Files
Step 11: Create Admin User
Run Laravel App
Step 1: Install Laravel 11
This step is not required; however, if you have not created the Laravel app, then you may go ahead and execute the below command:
composer create-project laravel/laravel example-app
Step 2: Create Auth using Scaffold
Now, in this step, we will create an auth scaffold command to generate login, register, and dashboard functionalities. So, run the following commands:
Laravel 11 UI Package:
composer require laravel/ui
Generate Auth:
php artisan ui bootstrap --auth
npm install
npm run build
Step 3: Create Migrations
Here, we will create posts and add is_admin column to users table. so, let's run the following command:
php artisan make:migration add_is_admin_column_table
php artisan make:migration create_posts_table
now, let's update the following migrations:
database/migrations/2024_06_18_140624_add_is_admin_column.php
<?php

use Illuminate\Database\Migrations\Migration;
use Illuminate\Database\Schema\Blueprint;
use Illuminate\Support\Facades\Schema;

return new class extends Migration
{
    /**
     * Run the migrations.
     */
    public function up(): void
    {
        Schema::table('users', function (Blueprint $table) {
            $table->tinyInteger('is_admin')->default(0);
        });
    }

    /**
     * Reverse the migrations.
     */
    public function down(): void
    {
        //
    }
};
database/migrations/2024_06_18_140906_create_posts_table.php
<?php

use Illuminate\Database\Migrations\Migration;
use Illuminate\Database\Schema\Blueprint;
use Illuminate\Support\Facades\Schema;

return new class extends Migration
{
    /**
     * Run the migrations.
     */
    public function up(): void
    {
        Schema::create('posts', function (Blueprint $table) {
            $table->id();
            $table->foreignId('user_id')->constrained()->onDelete('cascade');
            $table->string('title');
            $table->text('body');
            $table->timestamps();
        });
    }

    /**
     * Reverse the migrations.
     */
    public function down(): void
    {
        Schema::dropIfExists('posts');
    }
};
now, Let's run the migration command:
php artisan migrate
Step 4: Create and Update Models
Here, we will create Post model using the following command. we also need to update User model here. we will write relationship and some model function for like and dislike
php artisan make:model Post
now, update the model file with hasMany() relationship:
app/Models/Post.php
<?php

namespace App\Models;

use Illuminate\Database\Eloquent\Factories\HasFactory;
use Illuminate\Database\Eloquent\Model;

class Post extends Model
{
    use HasFactory;

    protected $fillable = ['title', 'body', 'user_id'];

    /**
     * Write code on Method
     *
     * @return response()
     */
    public function user()
    {
        return $this->belongsTo(User::class);
    }
}
app/Models/User.php
<?php

namespace App\Models;

use Illuminate\Database\Eloquent\Factories\HasFactory;
use Illuminate\Foundation\Auth\User as Authenticatable;
use Illuminate\Notifications\Notifiable;

class User extends Authenticatable
{
    use HasFactory, Notifiable;

    /**
     * The attributes that are mass assignable.
     *
     * @var array
     */
    protected $fillable = [
        'name',
        'email',
        'password',
        'is_admin'
    ];

    /**
     * The attributes that should be hidden for serialization.
     *
     * @var array
     */
    protected $hidden = [
        'password',
        'remember_token',
    ];

    /**
     * Get the attributes that should be cast.
     *
     * @return array
     */
    protected function casts(): array
    {
        return [
            'email_verified_at' => 'datetime',
            'password' => 'hashed',
        ];
    }
}
Step 5: Create Pusher App
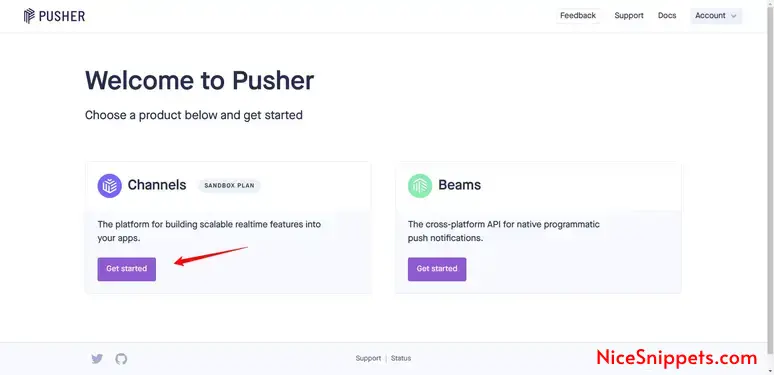
First of all, we will create account on pusher website and get App ID, Secret, Cluster and Key. so, let's create it now.
1. Create Account on Pusher Platform, if you do not have
2. Next, click on Get Started button.
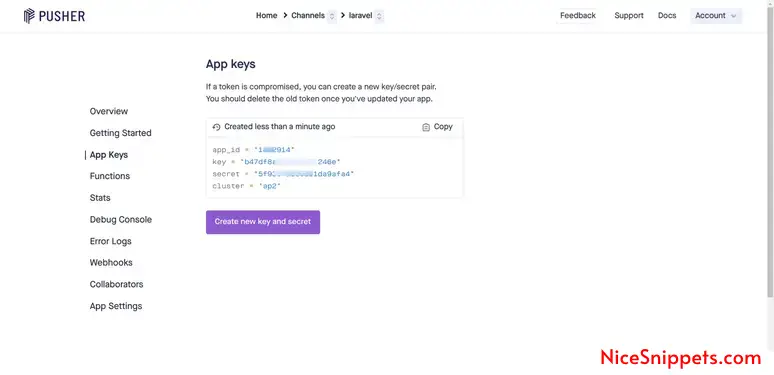
3. Add your App Name and click to submit

4. Now, go to App Keys section and copy App ID, Secret, Cluster and Key. we will use it latter on this step:
Step 6: Setup Pusher & Echo Server
Now, we need to configure laravel broadcast and pusher as driver.
So, first by default laravel has not enabled broadcasting, so you need to run the following command to enable it.
php artisan install:broadcasting
Now, we will install pusher-php-server to use driver as pusher, so let's run the below command:
composer require pusher/pusher-php-server
Now, we will install laravel echo server, so, let's run the below commands:
npm install --save-dev laravel-echo pusher-js
now, you will see some code on the echo.js file, where you can made a changes:
resources/js/echo.js
import Echo from 'laravel-echo';

import Pusher from 'pusher-js';
window.Pusher = Pusher;

window.Echo = new Echo({
    broadcaster: 'pusher',
    key: import.meta.env.VITE_PUSHER_APP_KEY,
    cluster: import.meta.env.VITE_PUSHER_APP_CLUSTER,
    forceTLS: false
});
Then, set the BROADCAST_CONNECTION environment variable to pusher in your application's .env file, also we will add pusher env variables:
.env
BROADCAST_CONNECTION=pusher

PUSHER_APP_ID="1822914"
PUSHER_APP_KEY="b47df8a8ea52a814246e"
PUSHER_APP_SECRET="5f9397a869..."
PUSHER_HOST=
PUSHER_PORT=443
PUSHER_SCHEME="https"
PUSHER_APP_CLUSTER="ap2"

VITE_APP_NAME="${APP_NAME}"
VITE_PUSHER_APP_KEY="${PUSHER_APP_KEY}"
VITE_PUSHER_HOST="${PUSHER_HOST}"
VITE_PUSHER_PORT="${PUSHER_PORT}"
VITE_PUSHER_SCHEME="${PUSHER_SCHEME}"
VITE_PUSHER_APP_CLUSTER="${PUSHER_APP_CLUSTER}"
Now again build your JS:
npm run build
Step 7: Create PostCreate Event
In this step, we need to create "Event" by using the Laravel artisan command, so let's run the command below. We will create the PostCreate event class.
next, run the following command to create event class.
php artisan make:event PostCreate
Now you can see a new folder created as "Events" in the app folder. You need to make the following changes as shown in the class below.
app/Events/PostCreate.php
<?php

namespace App\Events;

use Illuminate\Broadcasting\Channel;
use Illuminate\Broadcasting\InteractsWithSockets;
use Illuminate\Broadcasting\PresenceChannel;
use Illuminate\Broadcasting\PrivateChannel;
use Illuminate\Contracts\Broadcasting\ShouldBroadcast;
use Illuminate\Foundation\Events\Dispatchable;
use Illuminate\Queue\SerializesModels;
use Illuminate\Contracts\Broadcasting\ShouldBroadcastNow;

class PostCreate implements ShouldBroadcastNow
{
    use Dispatchable, InteractsWithSockets, SerializesModels;

     public $post;

    /**
     * Create a new event instance.
     */
    public function __construct($post)
    {
        $this->post = $post;
    }

    /**
     * Write code on Method
     *
     * @return response()
     */
    public function broadcastOn()
    {
        return new Channel('posts');
    }

    /**
     * Write code on Method
     *
     * @return response()
     */
    public function broadcastAs()
    {
        return 'create';
    }

    /**
     * Get the data to broadcast.
     *
     * @return array
     */
    public function broadcastWith(): array
    {
        return [
            'message' => "[{$this->post->created_at}] New Post Received with title '{$this->post->title}'."
        ];
    }
}
Step 8: Create Routes
routes/web.php
<?php

use Illuminate\Support\Facades\Route;

use App\Http\Controllers\PostController;

Route::get('/', function () {
    return view('welcome');
});

Auth::routes();

Route::get('/home', [App\Http\Controllers\HomeController::class, 'index'])->name('home');

Route::get('/posts', [PostController::class, 'index'])->name('posts.index');
Route::post('/posts', [PostController::class, 'store'])->name('posts.store');
Step 9: Create Controller
Here, we require the creation of a new controller, PostController, with an index method to send a notification route. So let's put the code below.
app/Http/Controllers/PostController.php
<?php

namespace App\Http\Controllers;

use Illuminate\Http\Request;
use App\Models\Post;
use App\Events\PostCreate;

class PostController extends Controller
{
    /**
     * Write code on Method
     *
     * @return response()
     */
    public function index(Request $request)
    {
        $posts = Post::get();

        return view('posts', compact('posts'));
    }

    /**
     * Write code on Method
     *
     * @return response()
     */
    public function store(Request $request)
    {
        $this->validate($request, [
             'title' => 'required',
             'body' => 'required'
        ]);

        $post = Post::create([
            'user_id' => auth()->id(),
            'title' => $request->title,
            'body' => $request->body
        ]);

        event(new PostCreate($post));

        return back()->with('success','Post created successfully.');
    }
}
Step 10: Create and Update Blade Files
In this step, we will update app.blade.php file and create posts.blade file. so, let's update it.
resources/views/layouts/app.blade.php
<!doctype html>
<html lang="{{ str_replace('_', '-', app()->getLocale()) }}">
<head>
    <meta charset="utf-8">
    <meta name="viewport" content="width=device-width, initial-scale=1">

    <!-- CSRF Token -->
    <meta name="csrf-token" content="{{ csrf_token() }}">

    <title>{{ config('app.name', 'Laravel') }}</title>

    <!-- Fonts -->
    <link rel="dns-prefetch" href="//fonts.bunny.net">
    <link href="https://fonts.bunny.net/css?family=Nunito" rel="stylesheet">

    <!-- Scripts -->
    @vite(['resources/sass/app.scss', 'resources/js/app.js'])

    <link rel="stylesheet" href="https://cdnjs.cloudflare.com/ajax/libs/font-awesome/6.5.1/css/all.min.css" />
    @yield('script')
</head>
<body>
    <div id="app">
        <nav class="navbar navbar-expand-md navbar-light bg-white shadow-sm">
            <div class="container">
                <a class="navbar-brand" href="{{ url('/') }}">
                    Laravel Send Realtime Notification using Pusher
                </a>
                <button class="navbar-toggler" type="button" data-bs-toggle="collapse" data-bs-target="#navbarSupportedContent" aria-controls="navbarSupportedContent" aria-expanded="false" aria-label="{{ __('Toggle navigation') }}">
                    <span class="navbar-toggler-icon"></span>
                </button>

                <div class="collapse navbar-collapse" id="navbarSupportedContent">
                    <!-- Left Side Of Navbar -->
                    <ul class="navbar-nav me-auto">

                    </ul>

                    <!-- Right Side Of Navbar -->
                    <ul class="navbar-nav ms-auto">
                        <!-- Authentication Links -->
                        @guest
                            @if (Route::has('login'))
                                <li class="nav-item">
                                    <a class="nav-link" href="{{ route('login') }}">{{ __('Login') }}</a>
                                </li>
                            @endif

                            @if (Route::has('register'))
                                <li class="nav-item">
                                    <a class="nav-link" href="{{ route('register') }}">{{ __('Register') }}</a>
                                </li>
                            @endif
                        @else
                            <li class="nav-item">
                                <a class="nav-link" href="{{ route('posts.index') }}">{{ __('Posts') }}</a>
                            </li>
                            <li class="nav-item dropdown">
                                <a id="navbarDropdown" class="nav-link dropdown-toggle" href="#" role="button" data-bs-toggle="dropdown" aria-haspopup="true" aria-expanded="false" v-pre>
                                    {{ Auth::user()->name }}
                                </a>

                                <div class="dropdown-menu dropdown-menu-end" aria-labelledby="navbarDropdown">
                                    <a class="dropdown-item" href="{{ route('logout') }}"
                                       onclick="event.preventDefault();
                                                     document.getElementById('logout-form').submit();">
                                        {{ __('Logout') }}
                                    </a>

                                    <form id="logout-form" action="{{ route('logout') }}" method="POST" class="d-none">
                                        @csrf
                                    </form>
                                </div>
                            </li>
                        @endguest
                    </ul>
                </div>
            </div>
        </nav>

        <main class="py-4">
            @yield('content')
        </main>
    </div>
</body>

</html>
resources/views/posts.blade.php
@extends('layouts.app')

@section('content')
<div class="container">
    <div class="row justify-content-center">
        <div class="col-md-12">
            <div class="card">
                <div class="card-header"><i class="fa fa-list"></i> {{ __('Posts List') }}</div>

                <div class="card-body">
                    @session('success')
                        <div class="alert alert-success" role="alert">
                            {{ $value }}
                        </div>
                    @endsession

                    <div id="notification">

                    </div>

                    @if(!auth()->user()->is_admin)
                    <p><strong>Create New Post</strong></p>
                    <form method="post" action="{{ route('posts.store') }}" enctype="multipart/form-data">
                        @csrf
                        <div class="form-group">
                            <label>Title:</label>
                            <input type="text" name="title" class="form-control" />
                            @error('title')
                                <div class="text-danger">{{ $message }}</div>
                            @enderror
                        </div>
                        <div class="form-group">
                            <label>Body:</label>
                            <textarea class="form-control" name="body"></textarea>
                            @error('body')
                                <div class="text-danger">{{ $message }}</div>
                            @enderror
                        </div>
                        <div class="form-group mt-2">
                            <button type="submit" class="btn btn-success btn-block"><i class="fa fa-save"></i> Submit</button>
                        </div>
                    </form>
                    @endif

                    <p class="mt-4"><strong>Post List:</strong></p>
                    <table class="table table-bordered data-table">
                        <thead>
                            <tr>
                                <th width="70px">ID</th>
                                <th>Title</th>
                                <th>Body</th>
                            </tr>
                        </thead>
                        <tbody>
                            @forelse($posts as $post)
                                <tr>
                                    <td>{{ $post->id }}</td>
                                    <td>{{ $post->title }}</td>
                                    <td>{{ $post->body }}</td>
                                </tr>
                            @empty
                                <tr>
                                    <td colspan="5">There are no posts.</td>
                                </tr>
                            @endforelse
                        </tbody>
                    </table>

                </div>
            </div>
        </div>
    </div>
</div>
@endsection

@section('script')
@if(auth()->user()->is_admin)
    <script type="module">
            window.Echo.channel('posts')
                .listen('.create', (data) => {
                    console.log('Order status updated: ', data);
                    var d1 = document.getElementById('notification');
                    d1.insertAdjacentHTML('beforeend', '<div class="alert alert-success alert-dismissible fade show"><span><i class="fa fa-circle-check"></i>  '+data.message+'</span></div>');
                });
    </script>
@endif
@endsection
Step 11: Create Admin User
In this step, we need to run the command to create the seeder to create admin user.
Let's run the migration command:
php artisan make:seeder CreateAdminUser
noww, we need to update CreateAdminUser seeder.
database/seeders/CreateAdminUser.php
<?php

namespace Database\Seeders;

use Illuminate\Database\Console\Seeds\WithoutModelEvents;
use Illuminate\Database\Seeder;
use App\Models\User;

class CreateAdminUser extends Seeder
{
    /**
     * Run the database seeds.
     */
    public function run(): void
    {
        User::create([
            'name' => 'Admin',
            'email' => 'admin@gmail.com',
            'password' => bcrypt('123456'),
            'is_admin' => 1
        ]);
    }
}
now, the run seeder using the following command:
php artisan db:seed --class=CreateAdminUser
Run Laravel App:
All the required steps have been done, now you have to type the given below command and hit enter to run the Laravel app:
php artisan serve
Now, Go to your web browser, type the given URL and view the app output:
http://localhost:8000/
Now, you have one admin user and you can register new normal user from registration form.
You can create post and Admin user will get the notification.
I hope it can help you...
#Laravel 11
